Share
Pin
Tweet
Send
Share
Send
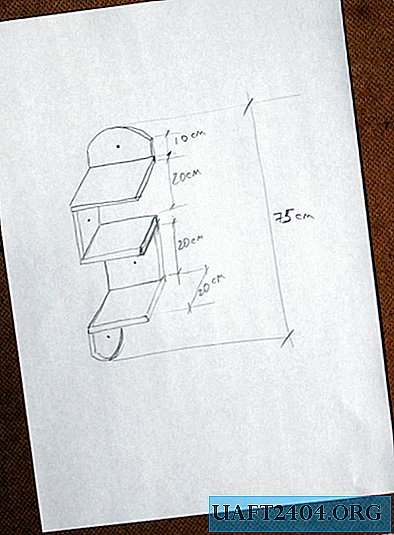
The most popular materials for the manufacture of shelves are wood, furniture, MDF, laminated particleboard, etc. Sometimes shelves are made from improvised means - laminate, plastic or even drywall. We will not change traditions and take a furniture plate as a raw material. For work you will need a jigsaw, drill, various fasteners, tape measure and pencil. First you need to sketch the future shelf for clarity of work processes.

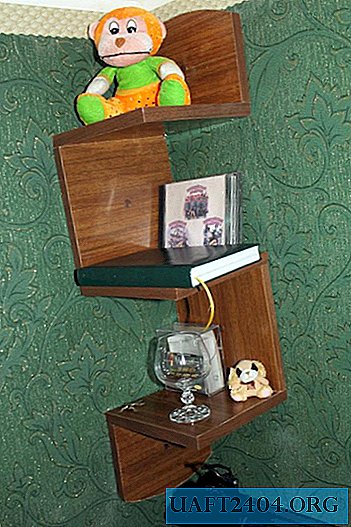
The shelf will be about 70 cm high with three sections. It will be fastened through vertical elements with the help of dowel nails, and the details will be interconnected by confirmations.

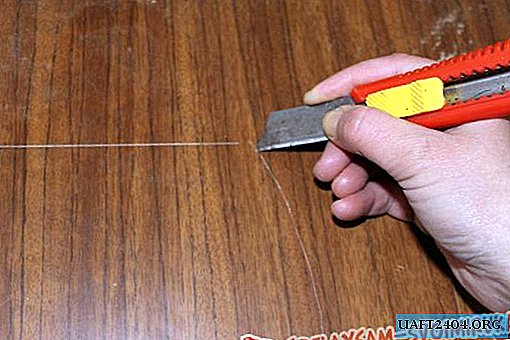
The first thing to do is mark out all the details on the stove. This is usually done with a pencil, but if the plate has a dark surface, then the trace of the pencil will not be noticeable, in this case you can use a knife. It is necessary to draw it along the cut line with his blade, without pressing strongly, after which a thin, white, noticeable line will appear along which it will be easy to cut.
To saw out the elements of the shelf, you can use an electric jigsaw. The saw blade should be with a fine tooth and intended for wood work. The saw speed regulator on the jigsaw must be set to the minimum value, and the mode dial must be set to "0". To facilitate the assembly of the shelf, it is necessary to number the parts in the drawing, and then put down the corresponding values on the structural elements themselves.

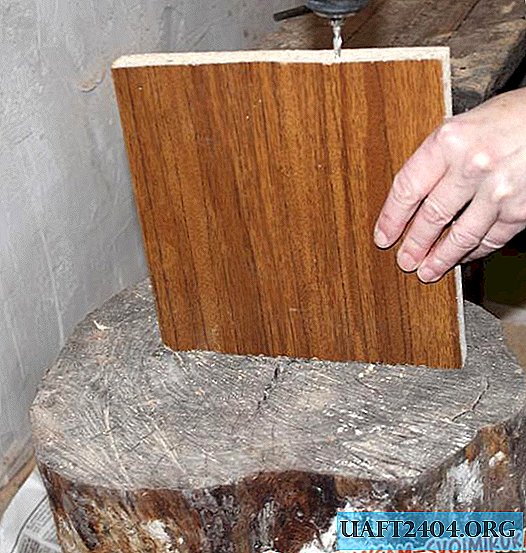
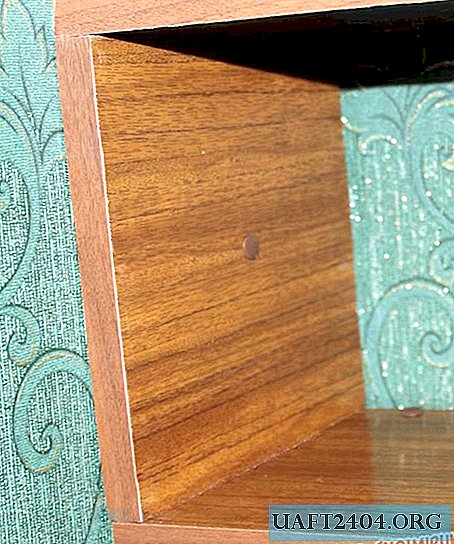
After all the details are cut, you need to drill holes in them for connection with confirmations. It is much easier to do this consistently. First you need to make holes in the shelf, and then through these holes drill corresponding to them in the supporting element. If there is no special drill for confirmations, then it is necessary to use 3 ordinary drills with different diameters - for the screw part, thickening and Euro screw cap.


Immediately at this stage, you can make holes for attaching the shelf to the wall. It will be fixed with a dowel-nails 6x80 mm through the supporting elements. All holes must be countersinked, this is necessary so that the nail head is flush with the surface.
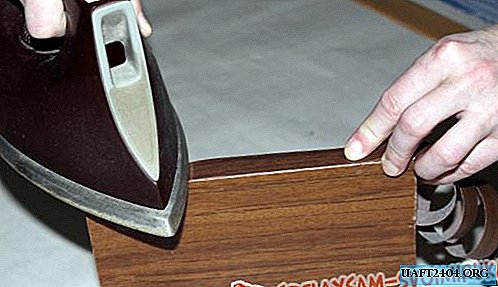
When all the details are cut, you can start decorating the edges. First, we clean all edges from dust and sawdust formed during sawing. Then we attach an edge tape to the ends and, using a preheated iron (preferably using an old, unused one), glue it to open surfaces.
Such trimming tape is available in a standard width of 1.8 mm, and the thickness of the furniture plate is only 1.5 cm, so part of the tape remains unnecessary and must be removed. We cut off the excess part of the edge using a conventional wallpaper knife.


We clean the resulting face with sandpaper with fine grain. You can close the ends with any other available method, for example, use a decorative cord, braid, special paper or cardboard.
Now you need to assemble the shelf. We carry out the assembly in accordance with the numbered scheme. To tighten the confirm, we use a hex wrench.
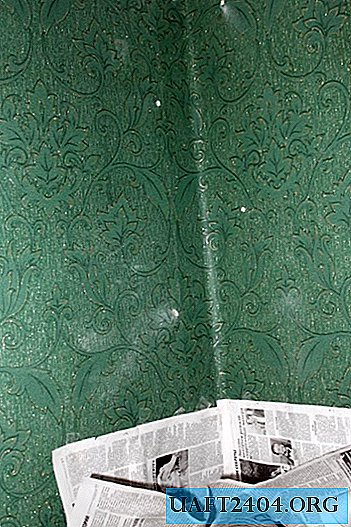
We try on the assembled structure in the place intended for it and mark the mounting points on the wall. For drilling in concrete or stone walls, we use a drill with a victorious tip. At the drill tip, the drilling depth necessary for the prepared dowel can be noted in advance. To prevent dust generated during drilling, it is possible to glue a paper "pocket" on the wall under the place of work.


After drilling, you need to insert dowels into the holes and fasten it with screw nails through the corresponding elements of the shelf, drowning the caps. This can be done with a hammer or an ordinary Phillips screwdriver.

You can decorate the open caps of fasteners with the help of special plastic plugs of a suitable color.
Perhaps such a shelf will turn out to be too simple in appearance, but after all we made it from materials that often gather dust in our pantry or live out their life in the country. The design can be changed at your discretion, for example, to make the supporting elements longer, and then the shelves can be used as bookshelves. Or choose a different outline of the end parts, in this case, the shelf will acquire additional decorativeness. In any case, a do-it-yourself piece of furniture will serve as an example of individual mastery of the owners of the house.
Share
Pin
Tweet
Send
Share
Send