Share
Pin
Tweet
Send
Share
Send
Flexible branches
First of all, you need to prepare flexible rods by cutting a bunch of grape branches, a meter and a half long. If a weeping willow grows in your area, this is also an option. Willow branches are recommended to soak or even boil, but I did not need it. Careful processing is required only for filigree weaving of baskets, and for a wreath freshly cut willow will do.
Start weaving
We connect the branch with a thin end to the butt to make a circle the size of a soup plate. We tie it with a thin end, as if we wanted to tie a knot around a thick knot, and then we simply braid it, wrap it until the thin end of the twig ends. It should be firmly tucked, roughly speaking, - plugged into the crevice between the weaving.
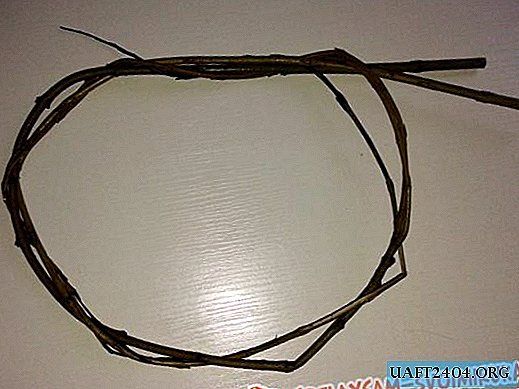
We apply the next rod, stepping back from the first komelka by a couple of centimeters, and again we braid-wrap. At first, the wreath is crooked, this is normal. The elastic force of the branches itself will straighten your wreath to a round shape, tested in practice. In total, branches for one wreath of medium thickness will need 6-7 pieces, provided that they reach a length of 1.5 m.

Having braided all the branches into a wreath, try to tuck the sticking out comli inward, just like you tuck a strand of hair that has been pulled out into the hairdo: push it under other branches. There is enough strength in the finished wreath to hold even the thick tips of the rods. You don’t need to trim anything, it’s even more picturesque.

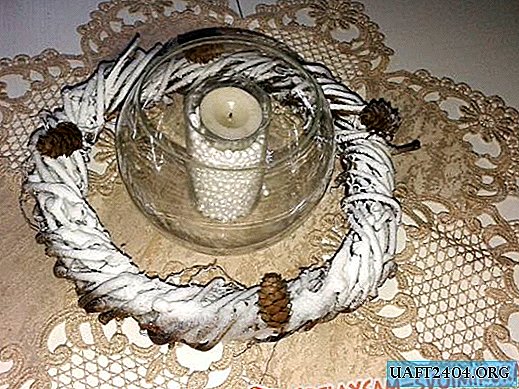
I got two wreaths: willow and grape. See the difference? Willow branches are thicker, therefore the wreath has smoother lines, and grapes are thinner and more flexible, therefore the wreath is more twisted. From the willow wreath, I decided to make chrome, as if metallic, in the hi-tech style. And the vine, so picturesquely laid in the coils of the second wreath, will serve as a beautiful basis for fluffy snow. Both snow and chrome spraying are made from spray cans.
Chrome wreath

Ordinary twigs, if coated with silver paint, acquire a magical completeness of a work of art. I "lent" my husband spray paint in a spray can to cover the chrome parts of the car.

It is best to “chrome” a wreath on a balcony or on the street due to a sharp chemical smell. Do not forget to shake the can well and place a newspaper under the wreath! That's what we got. As if thick steel or silver bars are bent and bound by an unprecedentedly powerful hand. Round gizmos are candlestick holders.

The dried wreath can be decorated with stylish balls with a silver texture. A little imagination - and the wreath already looks different. I posted a few options. Of course, everything will be different with you! Experiment!


Snow wreath

The second wreath is made of twigs of grapes. I will decorate it with artificial snow and also from a spray can. You know, such cans are sold, very inexpensive. "Snowball" is blown out of them in the form of foam, but this foam does not melt, it forms a fluffy snow cover. One spray is enough for a Christmas tree, and for stencils for windows, and for the decor of our wreath. Just spray the snow and let it freeze a little. The frozen "snow" becomes quite dense and you can put balls, artificial apples on it, and anything! So I tried this way and that, different options: with candles and without them.


Knitted wreath

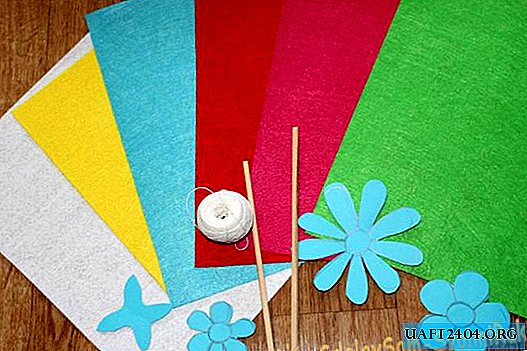
I foresee that not everyone will want to weave wreaths from branches. Nothing, you can make a charming wreath for decorating a table or an entrance door from improvised material. Do you have knitting yarn? Fine! Let's tie a wreath on knitting needles or crochet. For such a wreath, we need a base - a foam blank in the form of a circle or a straw semi-finished product. You can get by with a cardboard circle, but then you have to give it volume with a cotton or sintepon winding. You probably know how to knit a narrow scarf. I chose the thickest threads and knitting needles, so my scarf was knitted from 10 loops. We’ll roughly estimate the length: a little more than half the circumference or a little longer. This is enough, because the “scarf” will be pulled onto the base quite tight to show the texture of knitting.

We sew the ends of the “scarf” with a kettel seam and gradually pull it onto the base, securing it in several places. If we compare our circle with the clock, then first we sew for 12 and 6 hours, and then for 3 and 9 hours. After that, stitching or pulling the edges along the bottom of the wreath with thread in tone will not be difficult.

The result was a cozy wreath that reminds us of childhood: tonsillitis, hot milk and you can not go to school! We will decorate our wreath with fluffy or shiny balls, and put a candle or a vase with tangerines and sweets in the center!

I hope you get at least one of my wreaths! Festive mood to you, my dear!
Share
Pin
Tweet
Send
Share
Send