Share
Pin
Tweet
Send
Share
Send
• Children under 12-13 years old.
• Blondes.
• Indigenous people of Central Asia and the Caucasus.
• And everyone else who did poorly at school.
Now let's get started. We will need:
• Flash drive. But only a miniature one is suitable, in which the connector is larger than the case.
• USB cable (male).
• A sharp knife (preferably a razor blade).
• Secondary glue.
• File (a small file will also work).
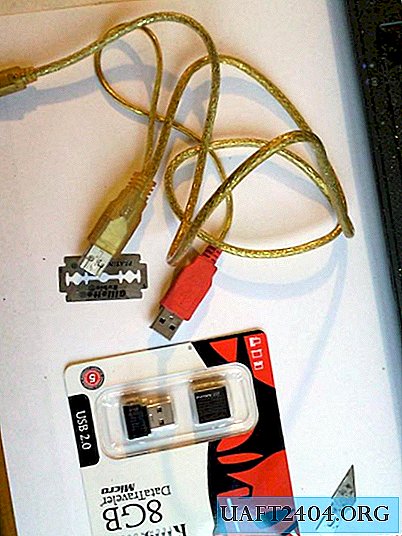
We cut off 10 centimeters of cord with the port and remove the flash drive from the package.

From the flash drive, remove all the plastic husk, and carefully cut the USB port along the solder line on both sides.

To the end should not be cut. The cord itself runs freely in a rounded part. Then we remove the metal part of the USB port from the shell and disassemble it.


To disassemble, it is necessary to unclench two teeth at the beginning of the cord, and slightly pry off with the sharp tip of the knife. Adhesive joints are no longer there. Please note that there are two micro latches on the sides. When assembling, they are useful for reference. At this point, it may be tempting to stick the disassembled flash drive directly into this plastic case. It is possible, but only the craft will be “sewn with white thread”. There are two reasons for this:
1. Too small part of the flash drive will be in the USB port housing. Even if you use good glue, then quickly enough the whole structure will break.
2. The empty part of the USB port will strongly give out the fakeness of the whole product.
And therefore, we will not deviate from the planned plan and disassemble the flash drive. There are no glue joints, but it sits very tightly in a metal case. It takes a little effort to extract. As a result, the contents appear.

This is not only the flash card itself, but the substrate with the upper seal. At this stage, you should make one replacement, which will give the finished product a great deal of realism. Need upper seal, replace with a white liner from the USB cable.

There are also two reasons for this:
1. The white liner fixes the whole structure much better, because it is held in the case by the entire surface (the native seal has a L-shaped profile).
2. After assembly, it looks more organic.
Now everything is ready and you can start assembling.

If necessary, the white liner should be cut a little.

Then gently push the entire structure into the metal part of the USB port.

At the next stage, the presence of a file (file) is required. The fact is that the metal part of the USB flash drive is longer than the same part of the USB port.

And for fixing the product, it is necessary that the lateral micro-latches enter the seats. The difference in length is not large - 1-1.5 mm., And they must be removed with a file. And now all the structural elements are fitted.

Carefully connect the metal parts of the product and clamp two teeth at the beginning of the cord.


Check the front of the flash drive. It should not protrude beyond the USB port.

Pulling on the cord, we pull the metal part into the cut PVC case.

Lubricate with glue and tightly squeeze the product. Let me give you some advice. When you press one part to another, hold them through a plastic bag. In case the glue comes out, your fingers will not stick to the body. In the final, you should cut the cord, leaving 5-7 cm. And loosen its end.

And so the original flash drive with a "satellite interface" will look in the PC jack.

Share
Pin
Tweet
Send
Share
Send

