Share
Pin
Tweet
Send
Share
Send
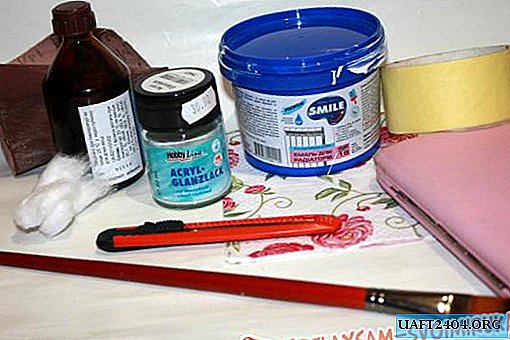
So, for work we need:
- old wallet,
- acrylic paint,
- a napkin for a decoupage,
- brush for paint and varnish,
- masking tape,
- alcohol, cotton wool,
- fine sandpaper (null),
- stationery knife,
- acrylic lacquer.
To begin, we will carry out preparatory work. Degrease the surface of the wallet with cotton wool and alcohol. Let’s dry.

If there are places that you would not want to paint, carefully glue them with masking tape. For me - this is the surface around the perimeter of the fastener.

Getting to staining the wallet. Immediately prepare the item on which you will paint and dry the wallet. I used a tube of cream suitable for the height of my wallet. We put the first coat of paint, let it dry.

Acrylic dries very quickly, literally 10 minutes. Tip: do not immediately apply a thick layer of paint, it is better to increase the intensity gradually; if you apply the paint with horizontal movements of the brush, do not switch to vertical, otherwise the paint will lie unevenly. Apply a second coat of paint, let dry.

If at this stage you are satisfied with the result and no stains are visible on the surface of the wallet, then the next stage can be skipped. But in my case, it is necessary to apply a third coat of paint. Remember: we do not change the direction of the brush.

After you have applied and dried the final coat of paint, test yourself. Place the napkin that you prepared for decoration on the product. If stains are not visible through it, then you can glue a napkin. If translucent, apply another coat of paint.
Open the surface of the wallet with a thin layer of acrylic varnish and gently smoothing the folds with a brush, glue the top layer of the napkin, let it dry.

After you pasted the napkin on both sides, let it dry, carefully cut off the excess napkin with a stationery knife and remove the masking tape.

This is how the spread of our wallet looks like.

If you notice small wrinkles somewhere, such as in the photo, you can easily get rid of them with sandpaper. It is advisable to use nulevka, so as not to erase the napkin to the base, because the napkin is very thin, it can easily be damaged.

We only need to open the wallet with several layers of varnish and let it dry. Varnish can be chosen as matte or glossy. In my case - glossy. It, like paint, should be applied with a brush, either with only vertical or only horizontal movements.
Acrylic varnish also dries quickly. But for safety reasons, leave the product for a day until the final drying of all layers, then enjoy your favorite thing in its new guise!

Share
Pin
Tweet
Send
Share
Send