Share
Pin
Tweet
Send
Share
Send
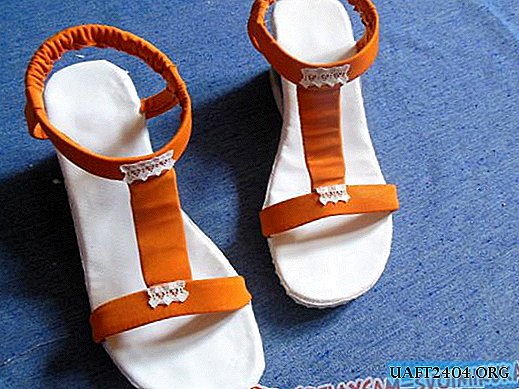
At first glance, you can’t say that these shoes were overhauled. Bright and stylish sandals look completely new, but in fact they have already been running a lot all last season.

So how can you bring so shabby shoes to feelings?
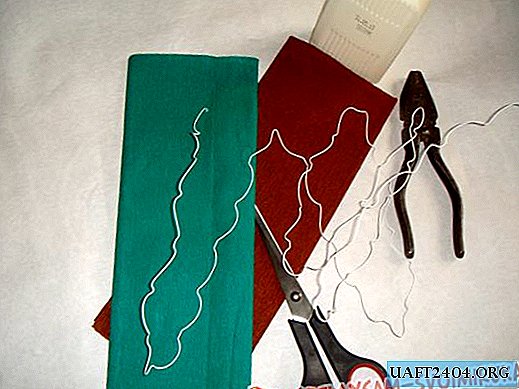
Firstly, you need to choose a fabric for finishing the straps. It should be elastic, (it is better to use a stretch), because a different quality of matter will not allow the finish to take the desired shape. Secondly, it should be tested for strength (with something to rub or just a good pat and stretch). Only after that you will see how the material transfers the load. For example, in this case, the selected fabric is very wiped off the face, and its shiny surface simply crumbles. But the wrong side proved to be good, in addition, it has a saturated color and smooth structure.

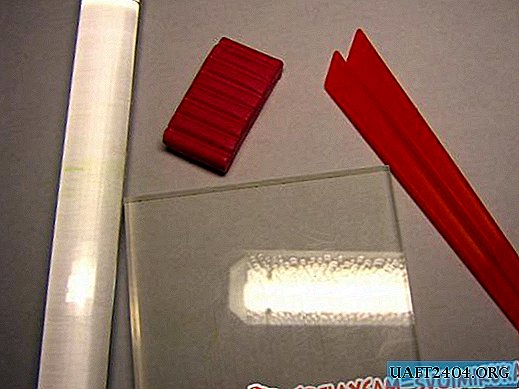
In addition to the fabric of the desired color, you should also choose the material for the insoles. It must be durable, because a soft structure (fabric, for example) can easily be damaged and smeared. It is better to take a matte PVC film, which is usually used for stretch ceilings. It will be easier to keep clean and safe.
Also prepare shoe glue, polymer contact adhesive for the skin, thin lace insole color (2-3 meters), thread number 30 plus a sewing needle, ballpoint pen and scissors.

First proceed to the inner cover of the shoe, creating durable insoles for it. Remember that to cover the left sandal, you need to circle the right one and vice versa, and it is mandatory on the wrong side of the PVC (then turning the cut out insole over, you will get the correct part in mirror image).


The insole should be cut with an allowance for hem; otherwise, it will be lifted up when walking. Coat the inside of the shoe with contact adhesive and put in a new insole.

Trim the excess carefully, freeing up the junction of the straps with the sole.


Already now (against the background of the new insole), it is clearly visible that the upper part is very burned out and wiped.

Now you need to give the insole time to dry out and tackle the upper partitions of the sandals. Unsuitable - replace, the rest - sheathe with a cloth.


To finish the gum should prepare a fabric with a small margin, because when put on, it should stretch without obstacles. Sew this piece only around the edges, leaving the center free.


Next, refine the sole by gluing the edges of the insole with shoe glue.

He must quickly and firmly grasp, so he will not have to wait long.

It remains only to hide this uneven incision with braid. It can also be used to decorate sandals by gluing small fragments on the straps.


And so they get new sandals from the old ones! Of course, it is not recommended to wear them in rainy weather, but they can completely cope with the rest. And if you work in a bank, office, store or any other place where you do not need to move a lot, then such replaceable shoes will simply not be replaceable. Indoors, she "resembles" a very long time and will always look neat.

Share
Pin
Tweet
Send
Share
Send