Share
Pin
Tweet
Send
Share
Send
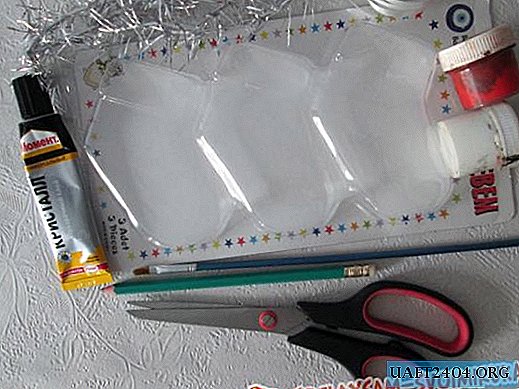
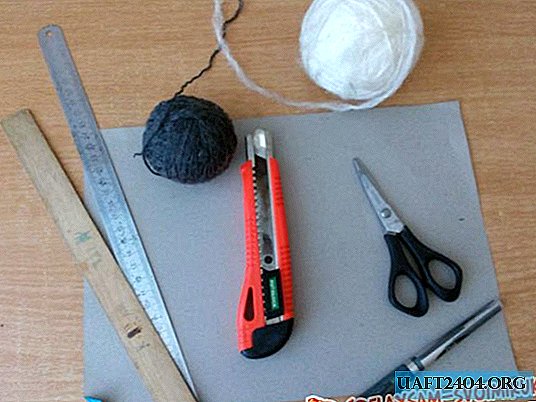
What do we need?
1- these are the balls of thread themselves (I will make from woolen, but others can be used)
2- this is cardboard, preferably dense, but normal will do the same.
3-scissors.
4- pen to draw a circle (it is better, of course, to use a pair of compasses).
5- for the nose - a piece of pink fabric 9x7 cm, sewing thread, needle.
6-blue (another color is also possible), red black and white self-adhesive.
And also we may need: a ruler, something with a sharp end (knife).
When you have found all the materials, you can begin to manufacture.
First we need to cut two circles out of cardboard. To do this, take cardboard and bend it in half.

Next, circle the circle. I used the ball, but it’s better, of course, to draw a circle with a pair of compasses.

Here's what happened:

After that, we cut it out, and we will have two circles:

Then in the center of the cut out circle we cut out another circle into which the ball will fit.
I have this:

And now with the help of a ruler we measure out 60cm of thread, "Kapitoshka" will hang on it.
Put it as shown in the picture.

Done! Now we cover all this with the second round and proceed to the next step.
Now we will wind the Kapitoshka itself, or rather, we will wind the circles as shown in the picture below

This must be done carefully, preferably round to round. Instead of one big ball, you can use several small different colors.
In the end, here's what it should turn out to be (it might be different for you):

Now you need to cut the thread along the edge of the circle (this is more convenient to do with small scissors):

After this, it is necessary to tighten and tie a thread on two knots, which is between the circles:

After being tied, remove the cartons, we no longer need them.
We raise our "Kapitoshku" and find a place for the face. We make it striped. Now proceed to the manufacture of the nose.
To do this, we need a piece of pink fabric 9x7 cm, an ordinary thread with a needle. From the fabric we cut a circle with a diameter of about 7 cm. Now take the needle, step back from the edge of 3mm and stitch it with a “forward needle” seam.
Here's what you should get:

We pull the kgug a little and fill it with sintepon or cotton.
After filling, we finally tighten the circle, fix it so that the cotton wool does not fall out (the ball should turn out)
Now let's get down to making eyes.
We will have them from self-adhesive blue, black and white.
Cut out the oval, as shown in the picture (you need to cut it evenly and taking into account the fact that black is the smallest and blue is the largest,):

Blue is more than white by 2-3mm, white is more than black by 2-3mm.
Cut the mouth out of red self-adhesive. Fasten the eyes above the nose, closer to the edges of the face.
Glue the mouth under the nose. It remains only to make the “Kapitoshka” fluffy.
All!
Photo of the finished product:

P.S. You can take a larger circle. Then the toy will be more. For example, I once shook a circle with a diameter of 23cm! Winding for a long time ...

This circle is made of plastic. And the captain turned out like this:

As you can see, the toy turned out beautiful and not expensive. If desired, even a child can do it.
Well, on this my article comes to an end, good luck to everyone in the repetition!
Share
Pin
Tweet
Send
Share
Send