Share
Pin
Tweet
Send
Share
Send
The main tool for working with polypropylene products is an electric soldering iron or iron. In the factory kit, it is equipped with nozzle sleeves for soldering pipe fittings of standard diameters. You can buy them separately. But there are cases when, for some reason, a factory soldering iron is not available and there is no way to buy it, and of all the parts, only welding nozzles are available. This is where a homemade plumbing soldering iron comes in handy.
This homemade from the category of "blew, spat and did the thing." You can assemble it literally on your knees from an old iron and a wooden bar. With such a home-made heater, you will definitely save the situation, and deal with the soldering of polypropylene pipes. And how to do it, we will show now.
What you need to assemble a soldering iron
- Old iron with a working heating sole;
- Wooden block, indicative section 40x50 mm, length 40-50 cm;
- Four self-tapping press washers, 3x14-16 mm;
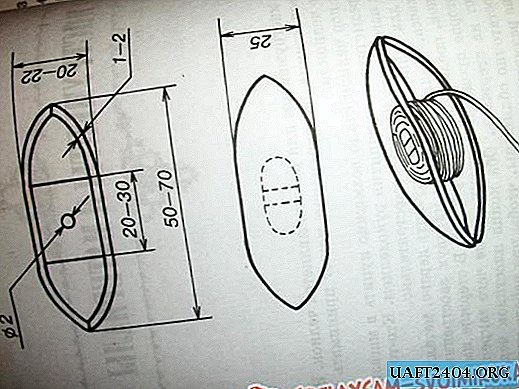
- Nozzle sleeves for a plumbing soldering iron with a clamping bolt;
- Power cable with plug;
- Insulating tape, self-tapping screws 45 mm.
Of the tools you must have: a drill or screwdriver with a cross head for self-tapping screws, drills with a diameter of 6-8 mm, a grinding machine or sandpaper, a paint knife, pliers and a hammer.
We assemble a homemade soldering iron for polypropylene pipes
First of all, we disassemble the household iron, disconnecting the sole from the thermostats. The rest of the iron we no longer need.


Next, we prepare a wooden block. If necessary, it can be sawn, planed, or simply cleaned on an emery wheel, as the author of the homemade did (photo).


To fix the bar, we drill several holes on the sole of the iron in a zone free from the heating element. The diameter of the drill must be less than the width of the screw head.


We fit the block over the section into the groove of the sole, and fasten it to several screws using a screwdriver and a cross nozzle.


At the end of the contact group of the heater there are bolts. Under them, we drill the groove holes on both sides of the bar, and unfold the contacts with pliers to connect them.


We press the contact plates with several self-tapping screws - press washers.


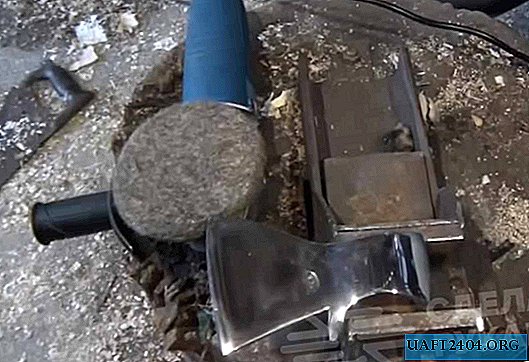
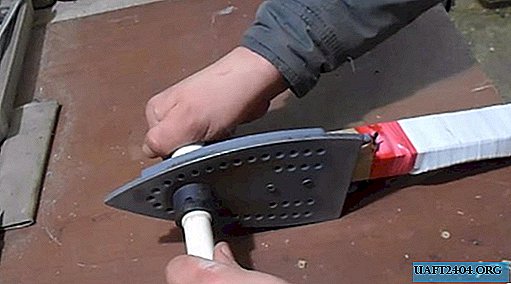
Near the end of the sole we drill a hole under the clamping bolt for the sleeves. Now you can fix several pair of welding nozzles. We sit them on the clamping bolt, and tighten with a hex wrench.


All that remains is to connect the power cable to the contact group, and wrap electrical tape around the contact area on the handle.


The soldering iron is ready to go. Such a device can be used for soldering polypropylene pipes and fittings, making plumbing or heating wiring.

Conclusion
Despite the simplicity of the design, it cannot be considered fully developed. It lacks a heating thermostat with protective automation. The ergonomics of the tool also leaves much to be desired, because such a device should stably stand on the edge during operation. However, this home-made device serves as proof that, if desired, even a specialized tool can be assembled from improvised parts.
Share
Pin
Tweet
Send
Share
Send