Share
Pin
Tweet
Send
Share
Send
We all know this device from school. In it, we examined bacteria, living and dead cells, objects and objects that we all see every day. Through a narrow viewing lens, they miraculously turned into models of lattices and membranes, nerve plexuses and blood vessels. At such moments, you realize how big and versatile this world is.
Recently, microscopes have begun to make digital. They are much more convenient and efficient, because now you do not need to peer closely at the lens. Just look at the monitor screen, and we see an enlarged digital image of the object in question. Imagine that such a miracle of technology can be done with your own hands from an ordinary webcam. Do not believe? We offer you to be convinced of this with us.
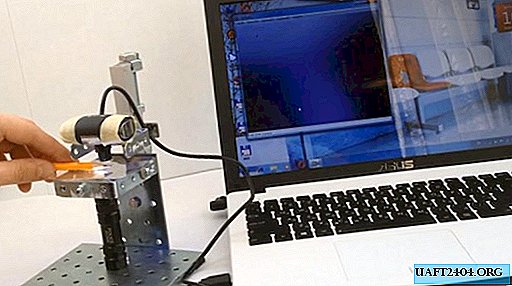
Necessary resources for making a microscope
Materials:
- Perforated plate, corner and brackets for attaching wooden parts;
- A section of a profile pipe 15x15 and 20x20 mm;
- A small piece of glass;
- Webcam;
- LED flashlight;
- M8 bolt with four nuts;
- Screws, nuts.
Instruments:
- Electric drill or screwdriver with a drill of 3-4 mm;
- Pliers;
- Phillips screwdriver;
- Hot glue gun.
Assembling a microscope - step by step instructions
For the tripod base of the microscope, we use perforated plates and metal corners. They are used to connect wood products. They are easily bolted together, and many holes allow you to do this at the required level.
Step one - mount the base
We cover the flat perforated plate on the back with soft furniture thrusts. We simply paste them at the corners of the rectangle.


The next element will be a bracket or corner with versatile shelves. We fasten the short shelf of the bracket and the base plate with a bolt and nut. Tighten them with pliers for reliability.


We mount two small brackets on the edge of the plate on both sides of it. We attach two more corners to them more authentically so that we have a small frame. This will be the basis for the microscope sight glass. It can be made from a small piece of thin glass.


Step two - make a tripod
We make a tripod from a section of a square profile pipe 15x15 mm. Its height should be about 200-250 mm. There is no longer any reason to do it, since exceeding the indentation from the sight glass reduces the image quality, and less risks being exposed and incorrect.
We attach the tripod to the perforated bracket, and on top of it we plant a small length of 20x20 pipe so that it moves freely along this rack.


From two brackets overlapping, we make an open frame. We choose authentic bolts so that they are enough to compress this frame around the movable pipe segment. We put on them a plate with two holes on the sides, and fix it with nuts.


To adjust the indentation of the frame from the sight glass, we use an M8x100 mm bolt. We need two nuts for the size of the bolt, and two larger ones. We take epoxy glue, and in three places we glue the bolt nuts to the tripod. The nut screwed onto the end of the bolt can also be fixed with epoxy.


Step three - make the lens
In place of the tube with the eyepiece in our microscope will be a regular webcam. The larger the resolution, the better, the connection to the computer can be either wired (USB 2.0, 3.0), or via Wi Fi or Bluetooth.
We release the camera from the case, unscrewing the motherboard with the matrix with a screwdriver.


We remove the protective cap, and unscrew the lens with lenses and a light filter. All you need to do is place it in the same place, turning it 180 degrees.


We wind the junction of the camera lens with a cylindrical body tape. If desired, it can be further glued with a hot glue gun. At this stage, the changed lens can already be checked in action.


Step Four - Final Assembly of the Microscope
We assemble the camera in the reverse order, putting its body on hot glue to the tripod frame. In this case, the lens should be directed downward to the microscope sight glass. The cable from the wiring can be pressed with nylon ties to the tripod stand.
We adjust the low LED flashlight under the sight glass illuminator. It should fit under the microscope viewing panel. We connect the camera to the computer, and after a while the image will appear on the monitor screen.


The assembly is ready, it can be checked at any object, for example, consider the crystal lattice of a pencil lead or the pixel structure of the screen of your smartphone. A popular area today is the use of such home-made or inexpensive microscopes to control the soldering of small parts on electronic circuit boards. Your child will surely enjoy it, and perhaps arouse interest in knowing the world around us.


Share
Pin
Tweet
Send
Share
Send


