Share
Pin
Tweet
Send
Share
Send
From the old kerosene lamp a wonderful electric lamp was turned out on the porch of the country house. You can, of course, buy ready-made items in the store, but there is something elusively attractive in the forms of old things. Yes, and a do-it-yourself interior item favorably emphasizes your personality.
You'll need:
• lantern itself
• light bulb (better energy-saving, it heats up less)
• electric bulb holder
• the wire
• a piece of tin or plywood
• a little nitro enamel for painting
• several screws
• 3-4 hours of free time
First you need to disassemble the flashlight. Carefully remove the glass and the part on which it rests with the bottom edge.
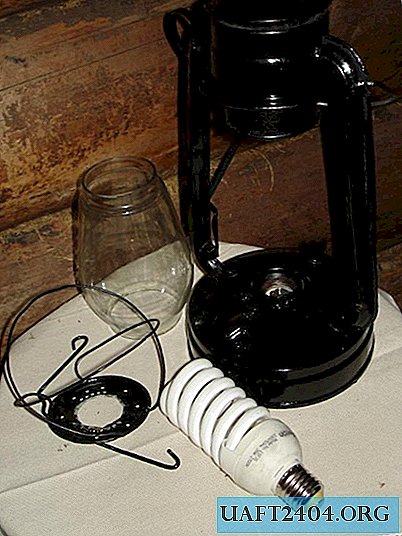
Bottom the diameter of the electric chuck with any available tool, cut a hole.

The photo was drilled around the perimeter and processed with a round file. The same thing needs to be done with the glass support only to select the diameter according to the size of the cartridge skirt.
From inside the lantern and at the top of the upright, drill two 8mm holes. and pull the wire in them.


The next step is to fix the cartridge on the basis of thin tin or plywood and screw it to the bottom of the lamp with screws. Now the entire structure needs to be cleaned with sandpaper, degreased and painted in several layers with nitro enamel. If you like vintage shabby, you can not paint.
For final assembly, first place the bulb inside the glass bulb. Then insert them together into the lamp housing. Then slightly raise the glass and, slowly, using the gap formed under the glass, screw the bulb into the cartridge. The lamp is ready.


Share
Pin
Tweet
Send
Share
Send