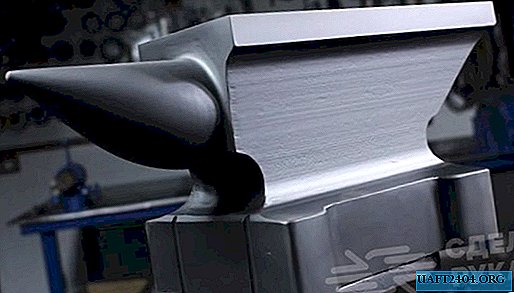
For making a do-it-yourself simple home-made anvil for a forge or a home workshop, they usually use a suitable piece of a railway rail, which can almost always be purchased for a penny at the receiving points of ferrous metal.

However, if possible, it is better to use the crane rail KR-140, which has a wider neck and also has good strength - at least 730 MPa.

On such a home-made anvil from the rail, you can perform various operations for hot or cold forging of metal - make a blank for a knife or dagger, flatten a steel bar, bend the armature at the right angle, and much more.
The main stages of work

First of all, we mark the workpiece, after which we cut it into two identical parts - this can be done using a grinder with a large circle. However, take extra precautions so that the cutting disc does not jam because the metal is very thick.

Then, using a plasma cutter, we cut one part of the workpieces at an angle, and treat the surface with a grinding disc for angle grinders. We put two pieces of the rail with the sole upward and make two U-shaped cutouts with a grinder, so that when the parts are tightly connected, a square “window” is obtained.

Anvil horn is made of a steel round disc using a plasma cutter, an angle grinder and a belt grinder, which is inserted into the "niche" between the rails.

At the last stage of work, we cut out a thick rectangular plate under the base of the anvil, after which we weld all the details into a single structure. For this purpose, it is best to use automatic welding. For a detailed process of making anvil, see the video on the site.