Share
Pin
Tweet
Send
Share
Send
To raise my mood, I decided to make a bead tree. To create it, I needed the following materials:
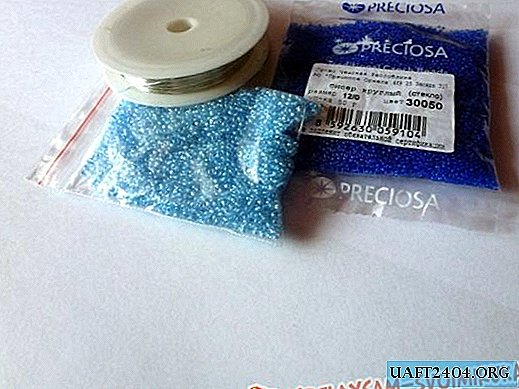
- beads (blue and blue);
- wire.
The first step is to prepare the wire. To do this, cut off segments equal to approximately 50 - 60 centimeters and bend them in half.

In order not to occupy excess space, it is better to immediately prepare a lot of such segments. Next, divide the entire cut wire into three approximately equal parts. The first part I will make two-tone. To do this, we collect 7 blue beads on one piece of wire.

They should be exactly in the middle. Now twist the loop.

Then, at one end we string another 7 beads and twist the second loop.


In the same way we make another loop, only now you need to string the beads on the other end of the wire.

In order to continue twisting, you need to make several turns with free ends to create a branch. So we got three leaves. Similarly, twist another 2.

In this two-color twig, I decided to make 11 leaves. In the next two leaves two colors will be present at once. At one end of the wire, we pick up such a combination of beads.

Then, as before, we twist.

The next two symmetrical leaves are made in blue.

The tenth and eleventh leaf is also made of blue beads. We twist the remaining wire in one end.

In the end, we get just such a twig. We will need about 20 of them.

The next type of branches I decided to make only from blue beads.

They turned out to be about 15. And another 15 from blue.


Now comes the crucial moment. We take three branches of the same type, and twist them together.


As a result, we get five fluffy branches.

We repeat the same procedure with branches of a different type.

Now we will combine the branches of different colors. I decided that in my tree the crown would be light, and closer to the roots the color would darken. Therefore, at first I took a light branch, and, attaching a combined branch to it, twisted them into one trunk.


Having retreated a little, we fasten the branches from dark beads.

We get such a tree.

Repeat the process on the remaining branches.

Next, we need a base for the trunk. I decided to use an unnecessary pencil. I twisted my branches on it.

In order to prevent anything slipping from the pencil in the future, the barrel is wrapped tightly with wire.


It is not necessary to wrap the trunk so that there are no gaps left. In my opinion, they will give an additional relief in the final form.
The next step is to create a base for the tree. For this, I used:

- plaster (plaster possible);
-water;
-package;
- a glass of yogurt.
In an unnecessary container, mix the plaster and water to the consistency of liquid sour cream.


Then, we cover the bowl selected for the base with a bag, and, holding the tree trunk, put our solution in it.

Carefully wrap the edges of the bag and send it to the far corner until it dries completely.

I used quick-drying plaster, so I did not have to wait long.


It's the turn of the trunk. We mix the plaster again, only this time not with water, but with PVA glue.


With a regular brush, coat the trunk and the base of the branches, and allow to dry.
The final stage. Use a brush and acrylic paints to give the desired tone to the plastered surface.

I decided to use pink and peach colors.

In addition to thick branches, the wire on the top of the tree was also slightly colored.

It turned out here is such a cute tree.

In order to prevent the base from merging with the furniture, I didn’t emphasize it with a cut of a bright blue silk ribbon.
Share
Pin
Tweet
Send
Share
Send