Share
Pin
Tweet
Send
Share
Send
In order for the process of creating an impression to take as little time as possible, it is recommended to prepare all materials in advance.
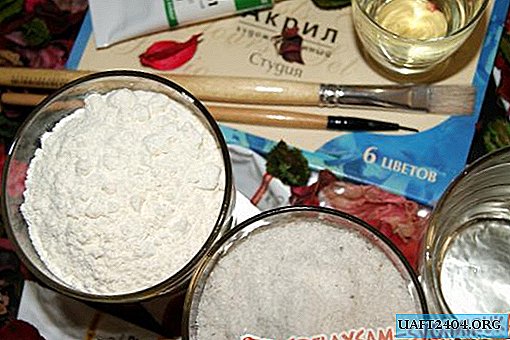
To prepare the test you will need:
- flour - 1.5 tbsp.
- finely ground salt "Extra" - 1 tbsp.
- vegetable oil - 2 tsp
- water - 1/3 Art.
We also prepare a deep plate, a tablespoon, a cutting board to roll out the dough and baking foil.
To design a finished panel, we take:
- paints - preferably acrylic, so that the finished product can be touched. Gouache remains on hand, and watercolor has a weak hiding power;
- brushes - let one brush be wide, for primer and background coating. The second is narrow, for ornament.
The flight of imagination in the design is unlimited, you can decorate it with glitter glue or nail polish, rhinestones, shells, etc.
Let's start kneading the dough.
The first stage - pour salt into a dish with flour. Please note that it is better to use salt just fine, with a large product it will turn out coarse.

Next, stir the salt and flour into a homogeneous mass. So it will be easier to knead the finished dough.

Then we make a deepening in flour and salt, and gradually pour warm water into it, in which 2 teaspoons of vegetable oil are diluted. It is more pleasant to knead the dough with butter, so it’s better to set, and you need warm water so that the oil dissolves better.

Kneading the elastic (this is important) dough in a dish, put it on a cutting board, knead it properly, roll it into a thick sausage, and divide it into two equal parts.

Knead each part again. The thickness of one figure should be 1.5 - 2 cm.

We put both pieces of dough on the foil, so that they do not stick together in the process, we press the handle and the heel of the baby in turn to them. The edges must be shaped immediately before baking.


After these funny manipulations, carefully transfer the foil from the panel to the oven. It is important that the dough does not crack, does not burn, and is baked through. Choose an average oven temperature - it’s better to bake longer, but better. The rough edges are treated with a regular nail file (in the photo the sides of the palm are polished, but the feet are not).

The most interesting part is decoration. With a large brush we remove the grinding dust, we prime the workpieces with white acrylic. Do not overdo it, as there will be more layers of paint so that there are no cracks.

We dry the grounded molds, and make out at will.


Your craft will turn out no less interesting and original. Have a good experiment!
Share
Pin
Tweet
Send
Share
Send

