Share
Pin
Tweet
Send
Share
Send
Let's get started. We will need:
• Light brown and brown pastel paper on a landscape sheet;
• Two sheets of any cardboard for the card layout;
• Scrapbook paper specifically for the school theme, only four sheets 15x15 cm;
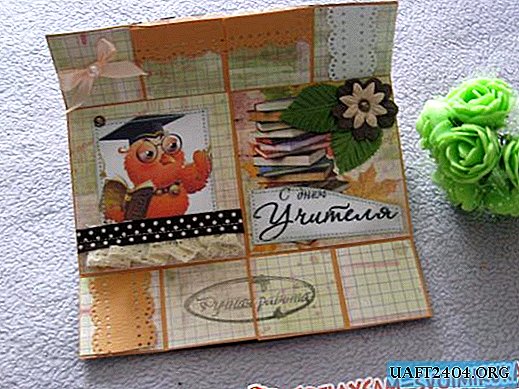
• Color pictures about the school and the inscription "Happy Teacher's Day";
• Lace openwork beige;
• Ribbon repa dark brown with polka dots;
• Puncher curb "Lace";
• Black ink and acrylic stamp "Handmade";
• PVA glue, pencil, double-sided tape, ruler, hot glue gun, scissors;
• For decoration, we take green leaves, brown, turquoise and peach flowers, a carved brown cardboard frame, different half beads, a metal key, a small leaf for congratulations.

To get started, we take cardboard and draw the size of the postcard scheme. The template shows that all we need to cut out for the base of the card is four rectangles 7 * 14 cm.


Cut two rectangles of 7 * 14 cm from pastel paper. Now, according to the schemes, we need to make bending lines, the so-called scoring. We put a book or a board under the paper for this and with a pair of scissors we make a scoring under the ruler.


The corners that are drawn on the diagram are those places where we will spread PVA glue and glue the rectangles together. We place rectangles No. 1 and No. 2 on the book tightly to each other vertically. With PVA glue, we smear the extreme upper and lower corners-squares.


We take square No. 3, turn it horizontally and spread the upper corner squares with glue and lay it horizontally on the blanks No. 1 and 2. Press and smooth.


Glue rectangle No. 4 also only now we smear the lower corner squares.


The glued corners leave to dry for about 15-20 minutes. Now twist the card. She's like a transformer, a U-turn behind a u-turn. In total, there will be four of them.


Now for each spread we will do our own decor. Each sheet has its own scrapbook paper sheet. From the remaining pieces we make paper lace with a hole punch.


Glue two pictures for each turn into squares of 7.5 * 7.5 cm. We sew each on a typewriter. Then we add a ribbon to the front picture and make a frill of lace, we also sew it. Cut the inscription tinted around the edge. All cardboard parts are glued only with double-sided tape.


Glue the rest of the decor at our discretion. We make an openwork note for congratulations from watercolor paper, stamp the inscription “Handwork” and smear one corner with glue, insert it into the second spread. This is a place to congratulate. Done. We expand, as they say, to infinity.


Share
Pin
Tweet
Send
Share
Send