Share
Pin
Tweet
Send
Share
Send
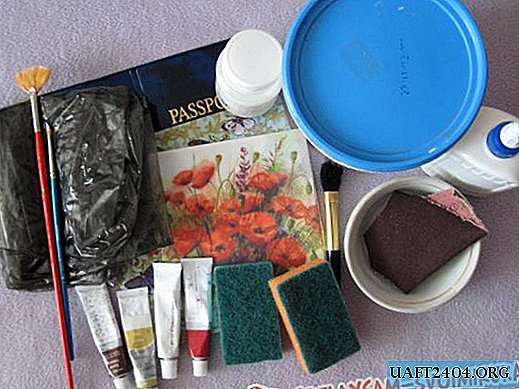
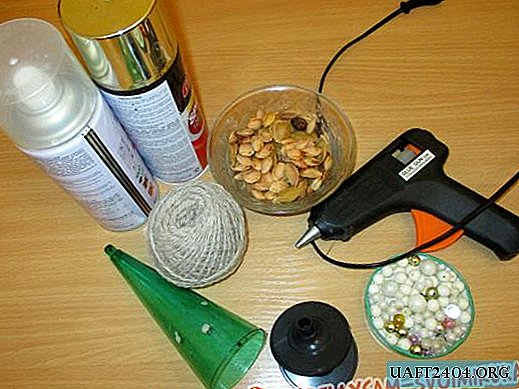
• a plastic wine glass under the base and two legs;
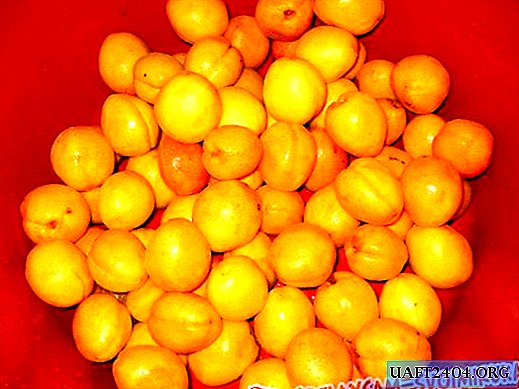
• natural material (plum and apricot kernels, or peach);
• decorative material (colored glass, beads, chains, sequins, etc.);
• glue gun and glue sticks;
• gold spray paint;
• nail polish with shine;
• glossy varnish spray;
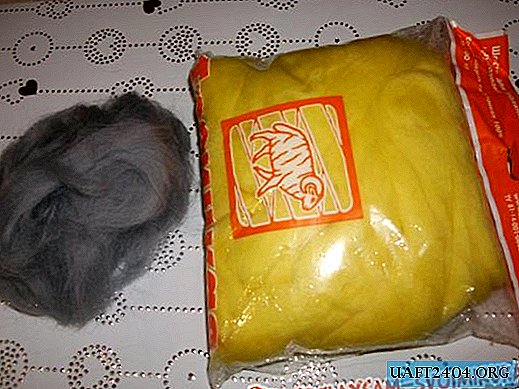
• natural color yarn and lurex.
1. Prepare the necessary materials. If necessary, wash and dry the seeds. The plastic base is to degrease the wine glass.
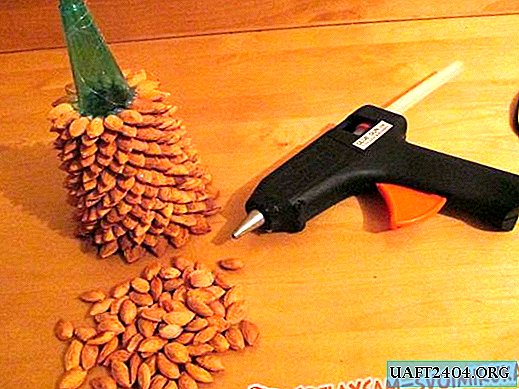
2. On the base, starting from the bottom, glue the plum bones. Glue the bones tightly to each other. For the lower row we use larger bones, and so on in decreasing order. For convenience, I pre-arrange the bones in size. Glue the next row of seeds tightly to the previous row in a checkerboard pattern. We continue to glue the bones, monitoring the uniformity of the rows. Having reached the top, glue the bones, directing them up. After we remove the formed glue web.


3. For the Christmas tree rack, we use two legs from plastic wine glasses. Degrease the legs and glue them with narrow ends with each other, reinforcing them from the inside with a rod. We wait until the glue sets well. Then we decorate the Christmas tree leg with natural yarn or a jute cord. Smearing the plastic leg with glue, row by row we glue the yarn in a circle.
4. The plum seed tree has already dried up by then, now it can be painted. If you spray paint from a spray can, you must go out into the open air (onto a balcony or courtyard). I use quick-drying acrylic spray paint. It dries quickly and does not smell so much. After the paint has dried, we connect the tree to the counter. We apply glue around the circumference of the upper side of the rack and on the lower edge of the plastic glass. We connect by tightly pressing. Now we see what a fluffy beauty we have turned out.


5. Go to the manufacture of asterisks. To do this, you can use the same plum seeds, or you can use a ready-made one. For homemade, we lay out 5-6 seeds in a circle like a flower. We put glue in the center and let it dry. Then we turn the asterisk and drip the glue on the other side. Let the glue dry. We paint an asterisk from a spray can or nail polish of a suitable color. Let it dry and gently glue to the top of the tree.


6. Now we proceed to the most interesting stage - decorate the Christmas tree. To do this, we use cute trinkets - beads, glass, sequins, chains - in general, anything you want for your soul and to your taste. I used beads in the shape of pearls of a color scheme, close to natural. I also added a few sequins in the form of snowflakes - after all, the Christmas tree. Launched a lurex thread in several turns so as not to clutter up. An asterisk was also decorated with snowflakes to hide gluing errors. At the base of the star, where she attached it to the tree, she also glued beads - as if the tree had put on beads (it also hid the sins of fastening). Having finished work, I can not fall in love with my beautiful Christmas tree. I have one such one. And you?

Share
Pin
Tweet
Send
Share
Send