Share
Pin
Tweet
Send
Share
Send
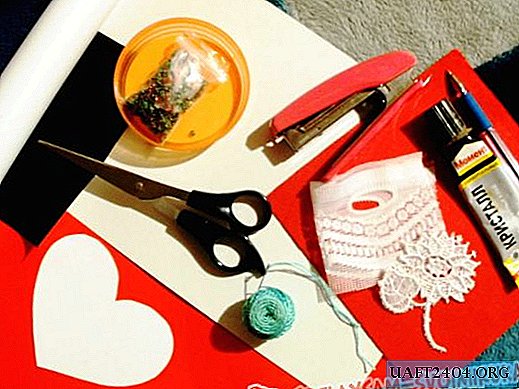
To make the box we take:
• Watercolor paper A3 format;
• White thick cardboard with embossed A4 format;
• Turquoise scrapbook paper, three sheets of size 20 * 20 cm;
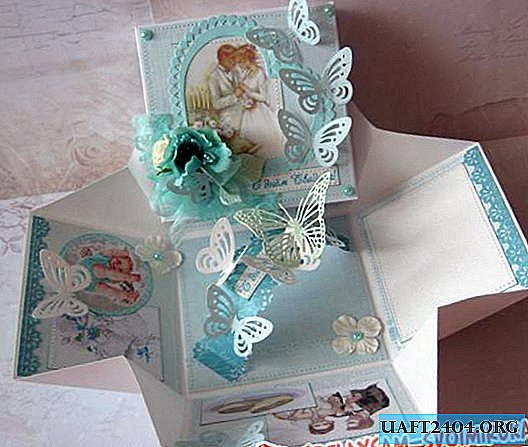
• Pictures on the wedding theme: rings, swans, newlyweds, baby, Eiffel Tower;
• The stamped inscription with turquoise ink "Happy Wedding Day";
• Paper butterflies from felling in white and turquoise;
• A large hollow heart of mint color;
• White paper hydrangea flowers with a diameter of 25 mm;
• Curb pattern hole punch;
• Mint ribbon organza 25 mm wide;
• Large turquoise poppy;
• Two latex roses beige and white;
• Turquoise pearl half beads;
• Ruler, glue stick, scissors, double-sided tape, thermal gun, simple pencil, ink pad.

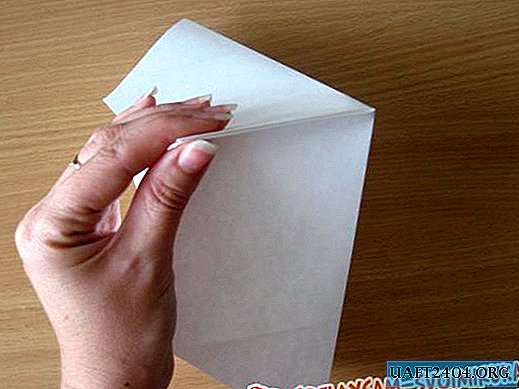
To begin with, we will make the basis of the box itself and the lid for it. We start with the box itself, take a watercolor A3 sheet and cut out a 29 * 29 cm square.


Divide each side of the square into three parts 9 * 11 * 9 cm. Now cross the lines of bends crosswise.


Now we connect the sides and corners of the sides of 11 cm to each other.


It turns out like this, we cut off the triangles.


Now we divide the sides in half by 6.4 cm. In total, the side we get is 12.8 cm.


We draw lines of bends to the center. It turns out that we have the basis of such an octagon.


Now we fold the boxes along all the bends.

We made the base itself, now we will cut out the base of the cover.


Take A4 cardboard and divide the square into such parts, 3 * 11.3 * 3 cm. Also draw bending lines and make cuts.


The base of the box is completely ready.


Now it will draw up the box. We cut out a square of 10.5 * 10.5 cm for the bottom, for the lid a square of 11 * 11 cm and eight rectangles of 8.5 * 10.5 cm for the sides of the box. Also, from the remaining paper, we punch a strip on both sides of the strip into which we will fasten the money.


The outer base of the box is glued with scrap rectangles on double-sided tape.


We glue pictures and inscriptions on the inside and the cover, all tinted around the edges with an ink pad.


Sew each picture with a typewriter. Glue all scrap rectangles inside the base, glue the square and onto the cover.


Sew each rib of the box and lid separately. Glue the lid around the edges.


Now we glue all the decorations with a thermal gun.


The result is such a wonderful and tender box for money for a wedding celebration. Thank you for your attention and good luck!


Share
Pin
Tweet
Send
Share
Send