Share
Pin
Tweet
Send
Share
Send
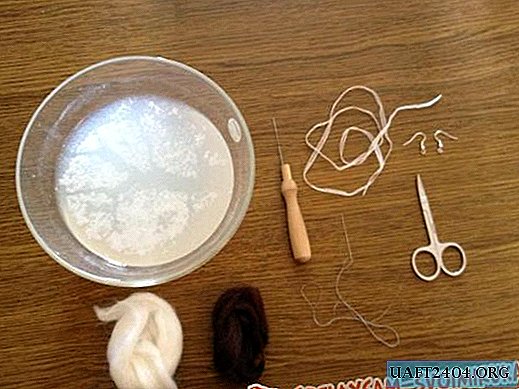
We will need:
- Base paper;
- Blank postcards;
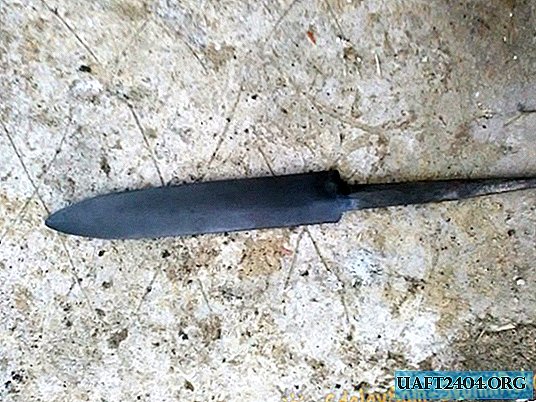
- Breadboard knife;
- Sparkles;
- Office glue (PVA);
- Glue brush;
- Curly scissors;
- Paper clips;
- Wooden Dostochka.
Tools and materials
First, let's talk about what tools and materials we can use,
which can be replaced without loss of quality and beauty of the work performed, and without which we simply can not do. Since we are making a card, we will definitely need paper. But what kind of paper it will be - already depends on your imagination and capabilities.
Ideally, you need to buy special paper for scrapbooking, in addition, for the technique of figured cutting, one that is painted on different sides in different colors is better. however, you can take plain watercolor paper or bed paper. Such paper is of sufficient density to create a postcard, in contrast to a landscape sheet. Cardboard, on the contrary, is too dense. The thicker the sheet of paper, the more difficult it is to cut and the blade of the knife dulls much faster.
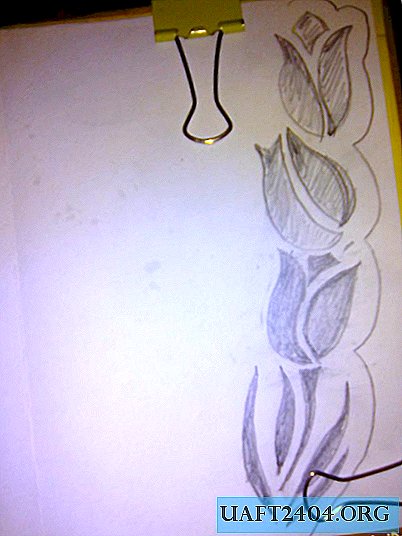
On the contrary, a blank for postcards is best made on thin paper. You can draw by hand, or print on a simple office paper a finished version from the Internet.
A dummy knife is the most convenient option for cutting, but you can use a simple clerical or even manicure scissors.
Spangles will suit any, both small and large. In addition, you can take small beads that are used by nail service masters (broths).
As a fixing composition for spangles, it is better to take PVA, since after drying it becomes transparent.
Any glue brush is suitable, but it should be thin enough to depict the intended pattern.
Curly scissors are used at will to decorate the edge of the card.
The paper clips can be replaced with paper clips or a stapler. It all depends on what is more convenient for you or what is available.
Wooden board is needed in order to protect the workplace from scratches. A plastic board is not so convenient. You can replace it with a special mock-up rug or an old thick magazine.
Work stages
1. Draw a blank;
2. We attach the blank to the base of the postcard with the help of clamps;
3. Carefully cut out along the contour of the picture;


4. Remove the cut parts;

5. We make out the edge with curly scissors;


6. Using a brush, apply glue according to the design and immediately sprinkle with sparkles.


Share
Pin
Tweet
Send
Share
Send