Share
Pin
Tweet
Send
Share
Send
For work, collect the following materials:
- magazine or newspaper sheets;
- scissors;
- a thin long skewer, a shaft of a handle or a knitting needle;
- PVA glue;
- a jar of 0.5 l;
- thick cardboard;
- pencil;
- blue acrylic paint;
- a piece of foam;
- any natural material (for example, cones).
Take the newspaper. The larger it is, the longer the weaving tubes will be.
Cut the newspaper to length.

Take one paper strip. To the lower right corner attach the rod from the handle (knitting needle, thin stick). While pressing the corner against the shaft, start curling the paper.

Gradually you will get a thin paper tube.

Coat the corner with PVA glue and fix it securely on the tube. So your workpiece does not unwind.

Take out a core. The paper tube is ready!

Screw approximately 20-25 tubes in the same way.

Now on a piece of cardboard draw 2 circles of the same diameter. As a stencil, you can use a 0.5-liter jar.

Cut out the circles. Glue 13 tubes on one of them, as shown in the photo. Lubricate them with PVA glue.

Then put the second circle and hold it with your hands.

Leave the blank for the night so that the glue dries, and the tubes stick firmly to the circles.
In the morning, work can be continued. Take a half-liter can, put it on a cardboard circle and bend up all the paper tubes. A jar is needed for even, accurate weaving.

Now take one paper tube, bend in half and put it on one of the base tubes.

Weaving begins. The half of the tube, which is in the foreground, should twist a vertical stick and lie in the background of the work. Then the front part again weaves a nearby standing vertical stick.

Gradually, weaving will emerge.
When the tube becomes short, it will need to be extended.

To do this, 2 additional tubes (extension) are put on the edges.


The weaving continues.

Make sure that the turns lie flat and not too tight.

When you reach the neck of the can, you can finish the job. Glue the remaining ends of the tube inside.
The jar is removed. The weave is reliable.
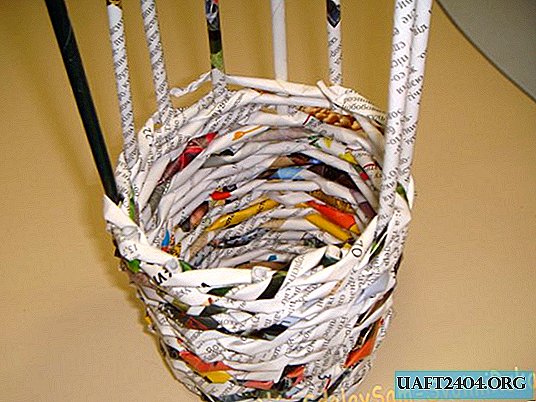
It remains only to trim the edges of the vertical tubes.

The result is an interesting paper vase.

If you paint it with blue acrylic paint, it will look like this.


Before filling it with natural material, the bottom needs to be strengthened with a piece of foam.

It is convenient to fix cones, twigs of pine, thuja and juniper on it.

It turns out a great winter composition.


Natural material can be changed by the seasons, and the vase will remain the same. The craft looks very beautiful!
Share
Pin
Tweet
Send
Share
Send