Share
Pin
Tweet
Send
Share
Send
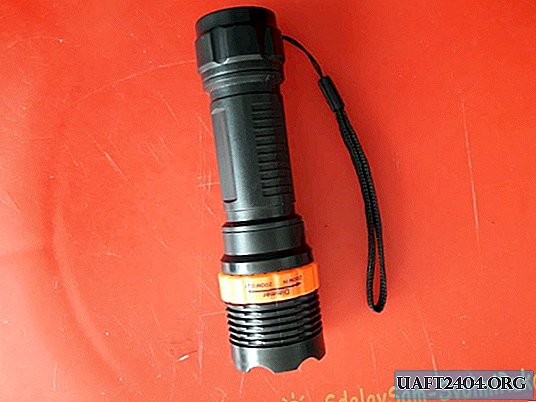

Having a special container in my backpack with four constantly charged 18650 batteries, I absolutely do not want to use other batteries. Especially so small and not capacious, like little ones. But there is always a way out! Having examined this flashlight in the store, the modification scheme matured right there, and without thinking twice, I purchased it in order to redo it in my own way in the near free time.
Will need
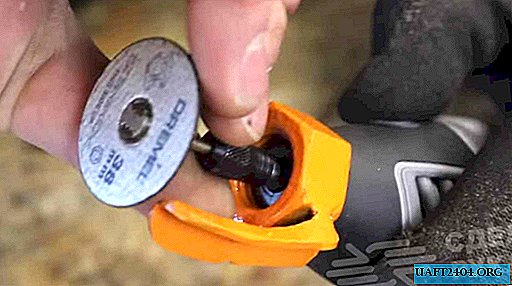
- Boron machine with a cutting disc (or emery machine).
- Soldering iron, tin and flux.
- Plastic tube (for insert into housing).
- Self-adhesive aluminum foil.
- Scissors.
- Stationery knife.
- File.
- Sandpaper (or sandpaper).
- Seconds glue.
Alteration of a flashlight
The main problem is that the "native" flashlight power supply (the case in which there are three AAA batteries) is a little wider, and a half centimeter below the 18650 battery.

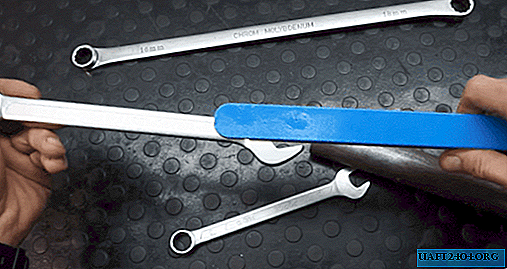
This means that the case of the flashlight itself will be small in height for the 18650. The 18650 voltage is almost identical to the three little fingers, the 18650 produces 3.7 volts, and the three little fingers give 3.6 volts in total (1.2 × 3 = 3.6) . So, if the case is small, you need to lengthen it. It was quite problematic to find a suitable insert tube that fills in the excess space between the battery and the walls of the flashlight. In the end, I couldn’t get a suitable insert ... I just took a more or less suitable tube, which includes the 18650 and, installing it on a drill, removed the excess thickness from the rotating workpiece with a rough emery cloth! So, we disassemble the flashlight. Unscrew the front and back of the flashlight from the middle, and set it aside. Using a boron machine with a cutting disc, we cut the middle part of the flashlight body into two equal halves.

We grind the sawn edges onto sandpaper so that they become even and smooth.

Next, insert the insert tube into the front of the flashlight with a reflector screwed onto it, put on the back with the bottom screwed onto it with a button. The result is a new, elongated body that fits the width of the 18650.


Now we will adjust the height, insert the battery into the case, measure the excess from above, take out the insert and cut off the measured edge with a clerical knife.


Even in the design of the flashlight, inside the case, there are two metal rings and a metal strip that connect the plus and minus on the switch button. It is natural that after lengthening the case, the metal strip became short for the new design. It was also necessary to customize the rings under the insert tube.

A layer of soft plastic quite easily and quickly removed a file from the edges of the liner where the ring should sit.


The second, front ring, was inserted inside the front of the flashlight, where the reflector, lens and LED are located, so there was no need to bother with it. With a metal strip connecting the ring, we’ll do simpler; just glue a strip of self-adhesive aluminum foil onto the liner.

We put the back ring on the prepared back of the liner.

Now we’ll deal with the “head” of the flashlight. On the former power supply, with little batteries, on the positive contact there was a slight bulge, which was in contact with the plus. On the 18650 battery, however, both contacts are flat, therefore, I had to solder the same spring to the positive contact of the front of the flashlight as it is on the negative, back.


Now we are putting together the new building.

All the details fell into place as relatives! It remains to drip the joints between the liner and the sawn edges of the body with super glue to restore the tightness. There was still space, or rather, it turned out a groove that formed after installing the sawn ends of the old case on the liner. Here, each individual case; before gluing all the parts, it is possible to fit a piece of tube, suitable parameters, to this place. I decided to just wind up a little tape and a black tape there; maybe somewhere needed.

Thus, we “transferred” this device from three batteries to one equal to them in voltage, thereby saving ourselves from tedious charging of the power supply with small and not capacious batteries.

The qualities of the flashlight (brightness and water resistance) the above changes did not affect in any way. Unless, he became one and a half centimeters longer.

Share
Pin
Tweet
Send
Share
Send