Share
Pin
Tweet
Send
Share
Send
Putting a simple fixture
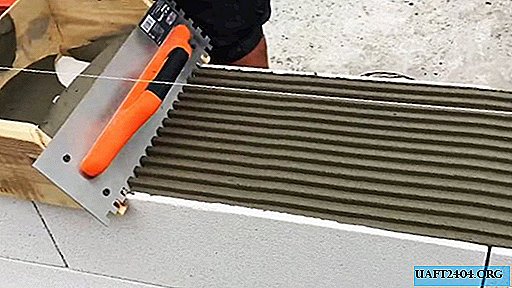
Materials for him can be found at any construction site or workshop. Suitable plywood or board with a thickness of 20-30 mm, a width of 10-15 cm, and a standard plaster trowel-comb. To fasten the entire structure, you need only a handful of screws or even nails.
This device is a box without a bottom, in which a trowel is fixed in place of one of the faces. The side walls of this tank are slightly lowered below the transverse by a few centimeters. Thus, they act as guides for the passage of the box itself along an already completed row of masonry.

The trowel must be fixed at an angle of 15-25 degrees so that the comb does not tear the line of the applied solution. It is most convenient to fix the trowel on self-tapping screws so that you can dismantle it after work and wash the tool.
The width of the box should correspond to the width of the stacked blocks. It is most practical to assemble such a simple design on self-tapping screws so that, if necessary, it can be adjusted to different widths of bricks.
Important! From the inside of the box along the side walls, it is necessary to build up small wooden blocks. Thus, during operation, the masonry will be reliably protected from cement mortar.
Laying foam blocks using the device step by step
1. We put the solution in the prepared container with a trowel, and pull it along the row of masonry. There is practically no discrepancy in the sizes of the blocks themselves, so our device should easily move along a flat line of a number of bricks;


2. Put the mortar on the end of the previous block with a trowel and level it with a spatula-comb. If the size of the ridges on the mortar and spatula is the same, then the seams are provided as uniform as possible;


3. Install the block in its place in the row, and nail it with a rubber mallet or manually. A reference point for alignment of a straight line will be a stretched lace. Clarity of masonry should be constantly monitored using a bubble level;

4. We perform the same procedure with the following blocks, not forgetting to observe the order of the spread of bricks in the masonry.


5. On the sides of the masonry, on the front and back, do not forget to pick up the excess solution squeezed in blocks on time. At the end of the row, we check its evenness with the help of a level.


Share
Pin
Tweet
Send
Share
Send

