Share
Pin
Tweet
Send
Share
Send
We will try to adapt the grinder for this matter, equipping it with a removable tooling based on a ring permanent magnet from a sound speaker. For this we will also need, and something else.
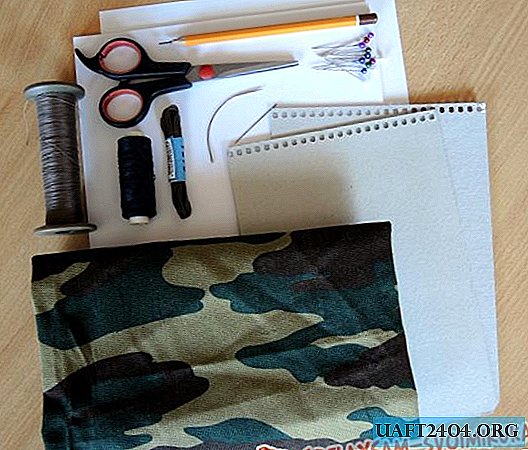
You will need:
- equal-angle steel corner;
- plain and long nuts, bolts and washers;
- threaded stud along the entire length;
- strip of metal;
- screws, clamp;
- black spray paint;
- glue;
- handle on the thread.
You will also need the following tools:
- drill and drill;
- vice is metalwork;
- grinder with a cutting disc;
- pliers, hammer and core;
- welding equipment;
- cross and flat screwdriver.
Manufacturing process
We take out the old speaker from the storerooms, shake off the dust and perform cleaning with a metal brush.

We clamp it by the flanges and magnet in a vice and drill the screw heads with which the basket is screwed to the upper flange. Separate the basket with the upper flange from the permanent ring magnet and the lower flange with a steel cylinder (core). Again, we clamp the basket with the upper flange in a vice and, using a hammer and a hammer, knock the flange out of the basket.

We don’t need a basket, and a permanent ring magnet, an upper flange and a lower one with a core are useful for making homemade products.
Clamp the bottom flange in a vice and grinder cut the core at the very base.

Next, we turn the part over, wrap it in the center and drill a hole, lubricating and cooling the working area, respectively, with oil and water. The surface of the lower flange from the side of the core core and the annular magnet is covered with glue and the flange is attached with the appendix down onto the magnet and after centering we fix them.


From a suitable equal-angle steel corner, we cut two fragments about 35 mm long.

We connect them with shelves and clamp in this position in a vice, and we weld the joint from the inside and out.

Grind the upper seam with a grinder. We weld vertically in the center of the joint of the corners of the elongated hexagonal nut by screwing a bolt into it from above to fix the nut when it is scalded.

Grind the seam with a grinder. We unscrew the auxiliary bolt from the nut welded to the corners.
We clamp the construction of two corners and a nut in a vice and on the shelves below closer to the side, drill holes opposite each other, cooling the drilling site with water.


We prepare a metal strip with a characteristic bend spreading the ends of the strip along two vertical planes.
We place it on top and longitudinally to the welding seam of the corners without stopping in the elongated nut and weld the handle strip in this position.

We return to the ring magnet with a flange and a nut glued from below to the core process. We screw on the front side of the flange a bolt with washer and nut.

On top of the bolt head we have an elongated hex nut and weld it in this position.

To the stud screwed into the elongated nut on the bolt head, from the other end we weld the same nut, but with a smaller diameter.

Units from two welded corners, an elongated nut and a curly handle, as well as a permanent magnet, a flange, a bolt with a nut and washer, and a welded elongated nut to the bolt head, are painted with black spray paint from a spray can.

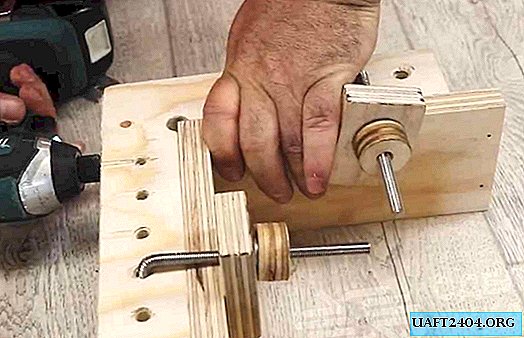
We put the first knot on the grinder so that the holes in the corners flanges coincide with the holes on the angle grinder, and the knot handle is directed along the tool body from above.

We fix the knot on the grinder with bolts on both sides, and fix the handle to the body with a clamp. Tighten all fasteners with a Phillips and flat head screwdriver.

We screw a stud into the elongated nut of the permanent magnet assembly, at the end of which a nut of smaller diameter is welded.

Then screw the pin into the nut until it appears on its other side. Continuing to rotate further, screw the free end of the stud into the elongated nut of the second assembly.

Screw the threaded handle into the nut at the end of the shaft. This operation, in fact, completed the manufacture and installation of homemade products on the grinder.
Practice test
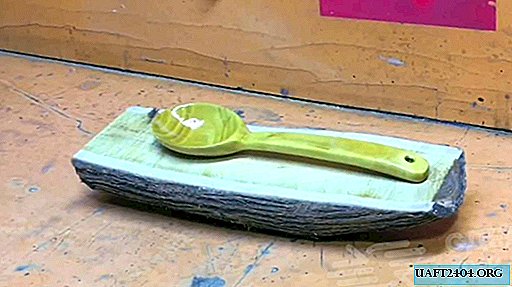
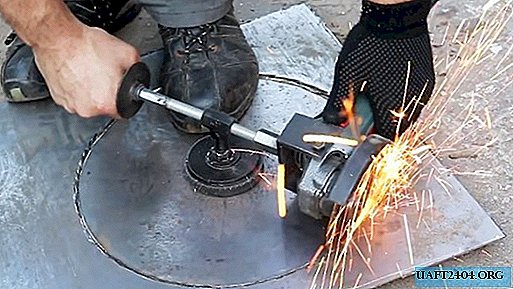
By rotating the permanent magnet assembly around the stud, you can increase or decrease the distance between the center of the nut (axis of rotation) and the disc of the grinder.

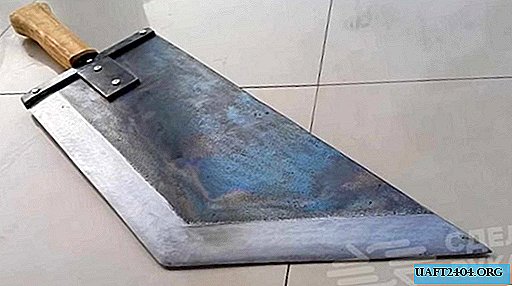
It will be equal to the radius of the circle, which we are going to cut in sheet metal, if the knot with the magnet is installed in the center of the circle to be cut, and the grinder with the disc is moved by the handle along the given radius, pressing the tool against the metal.

After the circle is cut out, turn off the grinder and raise the circle together with the angle grinder due to its retention by the force of the permanent magnet of a homemade device.


The device at any time can be disconnected from the grinder and put into a drawer until the next need.

If you, by the way, tightly clamped the disk, then there is a very simple way to unscrew the angle grinder - //sdelaysam-svoimirukami.ru/4301-legkiy-sposob-otkrutit-gayku-bolgarki.html
Share
Pin
Tweet
Send
Share
Send