Share
Pin
Tweet
Send
Share
Send
Will need
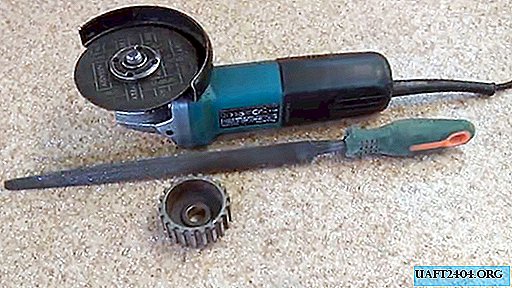
In addition to the mentioned gear, we will need a small segment of the steel pipe and a bolt connection commensurate with the transverse size of the timing gear mounting hole.
In work, we will have to use the following tools and equipment:
- lathe and grinder;
- calipers;
- files for metal with a rough and thin notch;
- bench vise and clamp;
- adjustable wrench and hammer;
- acetylene gas welding;
- a container of water.
The procedure for the manufacture of milling cutters for wood from timing gear
In order to exclude the beating of the gear during processing on a lathe, we clamp the metal tube in the chuck and grind its end to the diameter of the gear mounting hole.

We install it on the turned end of the tube, press it with the tailstock and process the end face of the workpiece.

We proceed to the most important operation - cutting the teeth on the gear. To do this, it must be securely fixed in a vice, which is not easy to do without a special holder.
It is not difficult to make. We insert a bolt suitable in diameter and length into the gear bore, on the other side of the workpiece, put the washer on the bolt, then the sleeve, and tighten the assembly with the nut using an adjustable wrench.
Now it is possible to securely fix the workpiece-gear to the holder in a vise and cut grooves of the same depth through all the hollows of the gear with a grinder. They will determine the height of the teeth and the angle of sharpening of the future cutter.


After cutting the grooves in the workpiece, we disassemble the holder, removing the nut and sleeve. We clamp the bolt rod in a vice so that the gear is on the side and it could be rotated with a key around a bolt located horizontally.

Having set the calculated sharpening angle, we use a grinder to cut the cutting teeth of the future mill on the end surface of the gear.

Having laid the gear with the bolt flat on a bench vise, remove the burrs and give the teeth the final shape, first with a file with a rough notch, and then with a shallow one.

Once again, we completely install the holder on the gear-workpiece and use a gas-acetylene welding torch to heat it until redness begins, and then sharply lower it into a container of water.


We check the hardness of hardening and notice that the metal is not sufficiently hardened, since it can be processed with a file with a small notch.
Once again, we heat the workpiece, but at a higher temperature, and bring the metal to a bright red glow, after which we immerse the almost finished mill in a container with water for hardening.
We grind a smaller one from the sleeve for the holder in order to compensate for the diameter of the mounting hole of our cutter 16 mm and the spindle diameter of the grinder 14 mm.

Testing a homemade wood milling cutter
We remove the cutting disc from the spindle of the grinder, install the adapter sleeve and on it - the home-made mill made from their timing gears, and fix everything with a clamping nut.


Firmly press a section of the board to the workbench table using a clamp, turn on the grinder and check it at idle without load. The tool runs smoothly, no vibration is felt.
We add speed and start milling the surface of the board. Immediately we feel a noticeable strain on the hands, which indicates that there is a large removal of wood. For convenience and safety, we screw a side handle into the angle grinder body.

If the work ahead is delicate, then the angle of sharpening the teeth of the home-made cutter needs to be done smaller, to increase productivity, on the contrary, it is performed more.
Share
Pin
Tweet
Send
Share
Send


