Share
Pin
Tweet
Send
Share
Send
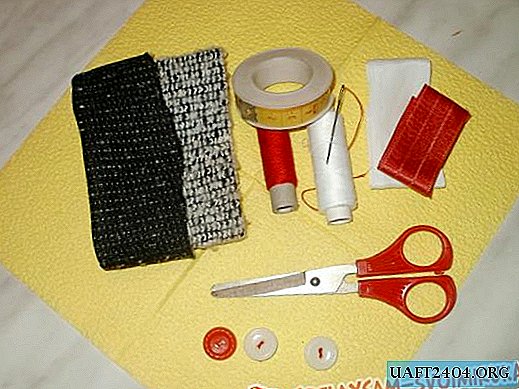
You will need a leaf from a notebook in a box, threads (floss or any for embroidery), a thick adhesive tape and a little time.
First you need to decide on the inscription that you will weave. In the example, the inscription "YNWA" will be weaving, which in abbreviation means the motto of the football club Liverpool.
In order not to get confused in the process of weaving and not to keep a picture in your head, it is best to draw a diagram on a piece of paper. It is more convenient to do it on a regular sheet from a notebook into a cell. Each box will mean one nodule. Choose how many threads you will weave and accordingly this height you will have your inscription.

The inscription is visible in the presented figure and the numbers of threads are written on the left side. Our example will have a height of 9 threads. Each cell denotes one bundle of prominent color, which will be written inscription.
Next you need to decide on the colors and threads. It is worth noting that for each knot there is an opportunity to be of two colors: the thread that weaves, and the one that is taken as the basis. Those. each column may have its own color, but we took two colors: one for the background (yellow) and one for the inscription (red). Because if the height of the inscription is nine, then you need to take nine strings of the inscription color (red) and one long thread of the background color (yellow). We tie them together with a knot and fix them on the table with tape, as shown in the figure.

We start weaving. The first row will be completely yellow to match the background color. In the right hand we take the yellow thread and tie it with a knot on the first red thread, tighten it.

So we do on each red thread two nodules of yellow. Do not be alarmed if the first row is not very even and the threads still do not want to line up exactly in turn. We knit one row. In order to weave the next rad you need to weave in the same knots, but only the yellow thread will be located to the left of the red ones and therefore the knot will also weave on the left.

Thus, it turns out that the yellow thread covers the red one to the side coinciding with the side to which weave. And in order to make a red knot, we just need to braid the knot with a red thread (one that goes in turn) over the yellow one in the direction opposite to the weave. The figure shows the beginning of weaving of the letter N. Weaving is carried out in this row to the right side, therefore the red thread is thrown to the left side.

As a result, it turns out like this.

Share
Pin
Tweet
Send
Share
Send