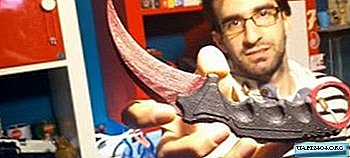
The 3D pen is very practical and convenient - with the help of a compact printer you can draw unusual models of geometric shapes and various "designs" that instantly become real. Do you like the popular kerambit knife from CS GO, but there is no way to buy the original? Then just draw it on paper. Using a 3D pen, the kerambit knife will turn out to be funny and interesting.
Preparation for work
To draw a 3D model of a kerambit knife, you will need to download a free product template from the Internet, as well as purchase a 3D pen. The printer model does not matter, the main thing is that an electronic device for three-dimensional graphics should be of high quality and as convenient as possible. Be sure to read customer reviews on the website of the online store before purchasing a product.

In the process, it is advisable to use ABS plastic for 3D-pens, which can be bought on the official website of the pen manufacturer or search on other online resources. This type of plastic is considered the most durable, while it is easily separated from the surface of the paper. You can use any color of ABS plastic, but try orange or green - it will turn out unusual and beautiful.
Stage 1. The base of the knife
When all the preparatory activities are completed, you can proceed directly to work. First of all, draw the frame of the product - the basis of the kerambit knife. To do this, take the desired template, downloaded from the Internet, and just start tracing the image along the contour. After that, fill the inner part of the stencil to get a completely monolithic "design" of plastic.
There is no need to rush anywhere, because one wrong move can lead to the fact that the work will have to be started anew. When the base for the knife is ready, it is necessary to apply another layer of plastic on both sides for greater strength. It should be noted that downloading the template is not a prerequisite. If desired, you can draw by hand, but the pattern is simpler and faster.
Step 2. Knife Details
First, you need to cut out the blade element from the paper, attach it to the plastic base of the knife and outline it along the contour. It is advisable to use black color to create a contrast of shades. Do not forget to fill the internal space to look as realistic as possible. This operation is mandatory carried out from two sides.
Then you need to cut the handle out of paper, attach the part to the workpiece and carefully outline both along the contour and inside. The last element that will need to be “glued” to the surface of the knife is a notch under the fingers. All operations are repeated similarly to the previous steps. When everything is ready, do not forget to put a layer of plastic on the edge of the handle. On this, the creative process can be considered completely completed.
Master Class
If something does not work out or it is problematic to find a suitable kerambit knife template on the Internet, be sure to watch a special video on our website. This is a simple lesson from which you will draw a lot of useful information on how to make a butterfly knife. Do not forget to share your impressions of the 3D pen and creative success in the comments.