Share
Pin
Tweet
Send
Share
Send
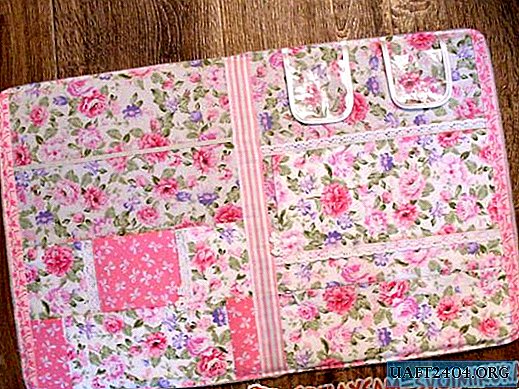
Such a thing can be purchased at the store, or can be made with your own hands, fully orienting its design and all the details to your needs.
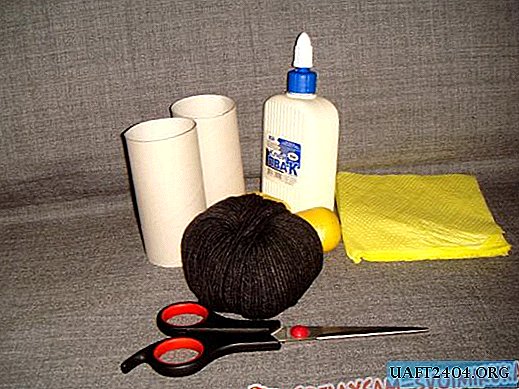
To make an organizer 36 * 58 cm in size (in open form) you will need:
1. A dense adhesive strip (it can be adhesive for collar shirts, a bando or a scraper). Instead of glue, you can use thick cardboard.
2. Fabric for organizer design (elegant American cotton is best suited, several types can be used).
3. Threads in fabric color.
4. Thin synthetic winterizer (with a density of not more than 150 g / m2).
5. 2 detachable zippers 45-50 cm long, in the color of the organizer.
6. 1 zipper 20 cm long, for pocket.
7. Elastic band for fastening knitting needles and hooks.
8. Knitted white linen for decorating the organizer, 1.2 cm wide, about 1 m long.
9. Sewing machine.
10. Iron.
11. Needle for manual work.
12. The line.
13. Chalk, soap or a simple pencil for cutting.
14. Scissors.
15. Clay "Crystal moment".
16. Pins.

4 rectangles 27 * 36 cm in size and 2 rectangles 58 * 36 cm in size should be cut out of the glue. Each two parts must be folded together with glue sides to each other and glued using an iron.

Small glue rectangles must be applied to the large one, aligning the side sections and glued to all corners to avoid displacing them relative to each other during further processing.

Then, the resulting part must be marked under the stitch as shown in the photo, placing the lines at a distance of 3 cm from each other.

The organizer seal should be quilted along the marked lines, as well as along the perimeter of the small rectangles. This technique will add stiffener.

From the main fabric of two types, you need to cut out the "cover" of the organizer. It can be of absolutely any design, the main thing is that in the cut of the page you get 28 * 38 cm in size. You also need a central insert - a 38 * 6 cm strip, which will be located on the end of the organizer.
In this case, the dimensions of the parts are:
Striped part - 4 pcs. 12 * 29 cm.
Detail in flower - 2 pcs. 18 * 29 cm.
Central insert - 1 pc. 6 * 38 cm.

All details of the organizer cover must be sewn together in a single cloth. The seams of the connection parts can be further decorated by sewn on top of lace.

The prepared cover with pins needs to be pricked on a synthetic winterizer.

The cover should be quilted on a typewriter on the inserts of striped fabric.


On the quilted cover you need to put a seal from the adhesive strip and notice it with large hand stitches around the perimeter. It is best to make the corners of the sealant rounded - it will be more convenient to process it with an oblique trim.

Based on the known sizes, it is necessary to carve out and assemble the inside of the organizer - pages with numerous pockets and a central strip. Pockets can be anything - with a padlock, Velcro, knitting needles and hooks, etc. The main thing is that there are a lot of them, and they are comfortable.
After that, the inner part of the organizer must be laid on the cover with the wrong side to the wrong side and gently sweeping around the entire perimeter. Corners need to be rounded off, cutting off the excess.

The organizer blank should be edged over the outer sections with a slanting inlay cut from the same fabric as the product itself. First you need to grind it on the front side, and then unscrew it and sew it on the wrong side, while simultaneously inserting a zipper into the seam for fastening.

The finished organizer needs to be zipped up, all the threads of the manual winding are removed. The product is fully ready for use.
Share
Pin
Tweet
Send
Share
Send