Share
Pin
Tweet
Send
Share
Send
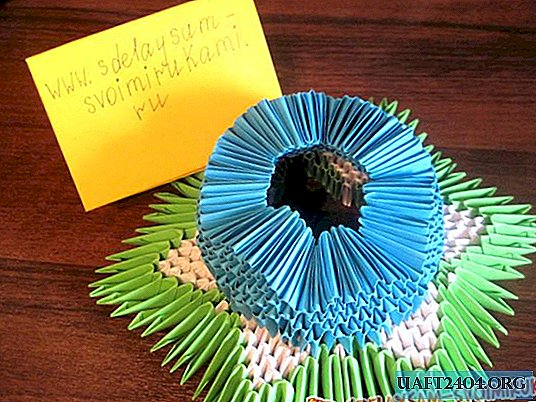
In today's Master Class, we would like to tell and show how to make a water lily out of origami paper modules. In the article you will find a detailed description and assembly diagram.
For the manufacture of water lilies the following materials will be required:
- Green paper modules
- Blue paper modules
- White paper modules
- Glue
We begin to manufacture water lilies using the modular origami technique:
In advance, you need to assemble modules from colored sheets of office paper.

Next, collect leaves for a water lily. To do this, take three modules: green, white, green.

On the next row, we increase the number of modules to four, that is: green, two white and green.
Third row: green module, three white modules, green module.

Fourth row: green module, four white module, green module
Fifth row: green module, five white modules, green module.

Next, we reduce the number of white modules in the row from five to one and end the row with one green module as shown in the photo.


For a water lily, we need six such leaves. We manufacture the remaining five, already according to the familiar scheme.

Next, using the remaining green and white modules, we collect our details as shown in the photo.


When the leaves are ready, we begin to make the petals. We also need six of them. From the blue modules we collect six petals in the same way as we collected the leaves, only first we increase the number of blue modules in a row to five, and then again reduce the number of blue modules to one.


Using the blue modules, we assemble our part and equalize the rows.


It should turn out here is such a flower, which in the future you need to turn the back side. We fasten the resulting parts with glue. Also, for reliability, you can saturate the entire craft with PVA glue diluted with water in a ratio of one to one.


Our water lily in modular origami technique is ready.
Share
Pin
Tweet
Send
Share
Send