Share
Pin
Tweet
Send
Share
Send
Will need
To make a beautiful, easy-to-use and reliable plastic mallet for many years, we must prepare the following materials:
- A can or two, it all depends on the size. Suitable are those made of low-pressure polyethylene (HDPE, HDPE);
- a wooden blank (maple, cherry, etc.);
- linseed oil.
The presence of the following tools and equipment will help to perform work at the modern technical level:
- electric furnace and building hair dryer;
- drilling machine and jigsaw;
- mill, grinder and grinder;
- planer, knife and spatula;
- clamps, chisel and hammer;
- wooden form.
The technology of manufacturing a plastic mallet
As raw materials for a plastic mallet, we use products from high density polyethylene, which is not susceptible to cracking.
Before melting, we cut the plastic into pieces using a construction knife, carefully removing stickers, labels, traces of glue, etc.

The crushed raw materials, folded on a metal baking sheet, are placed in an electric furnace heated to about 125 degrees Celsius, at which the plastic softens and begins to melt.

If it turns out that after melting the mass is insufficient, then you can add more raw materials on top of it and re-heat everything again.


While the polyethylene is melting, we will make a handle for the plastic head. From a wooden board, according to the marking, cut a workpiece with a jigsaw.
Then we process it with a manual plane, giving the tree the desired profile and cross-section. Round off the edges of the workpiece with a mechanical milling head. We clean and grind the handle with a grinder with a grinding disk.

We take out a baking sheet with molten polyethylene from the electric furnace and, prying off with a spatula, put it in a wooden box, heating the mass with hot air from a hair dryer.


As soon as the softened plastic is in the box, we cover it with a lid-punch on top and press it in with clamps, while other stops keep the bottom and side walls of the box from moving.


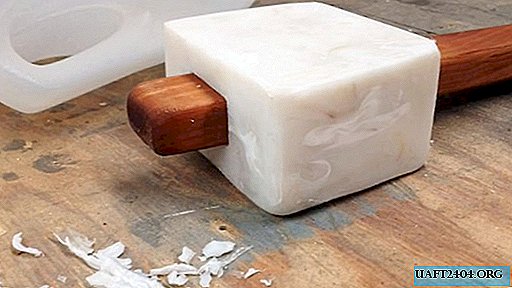
After hardening the plastic mass and making it rectangular, remove the clamps, disassemble the box and remove the workpiece of the head of a mallet. With a jigsaw, we give the plastic block the necessary dimensions and shape.

We carry out a through hole for the handle on the drilling machine in the head blank. With a chisel and hammer, we expand and modify round drilling to rectangular, in which the input section is larger than the output.


We put the head of plastic on the handle of wood. Due to the narrowing section of the hole and handle, the fastening is reliable and durable without additional effort and elements. We remove the head and finally adjust the sizes and adjust the shape on the grinder.
We collect the mallet again and grease the handle with linseed oil. Such impregnation will increase the service life of the handle, protecting it from moisture.

Working with a plastic mallet is much more convenient and efficient compared to a wooden one due to its compactness, weightiness and the absence of a rebound.

Share
Pin
Tweet
Send
Share
Send


