Share
Pin
Tweet
Send
Share
Send
For the product you need:
- wrapping paper or wallpaper, painted with wood in size 0.50 x 0.32 m (up to 0.40 m),
- 3-4 sheets of white office paper,
- white sewing thread (No. 30) - 1.5-2 m of thin copper wire,
- clerical stapler or glue,
- scissors

The sequence of execution of the "woody" basis.
1. From wrapping paper or wallpaper painted under wood, cut 4 strips 50-53 cm long, 8 cm wide. Bend the strip along the middle, wrap the edges inward and align, press. You should get a dense strip from which the matting grid will be made - the basis for fixing flowers on it.

2. Four strips of the same length and width will be enough, but you can, imagining, add such a lattice with several thinner strips - up to 0.7 cm wide - this will give the product elegance.
3. Arrange, bend and connect the strips of the matting as you wish. The figure suggests one of the options.

Flower making
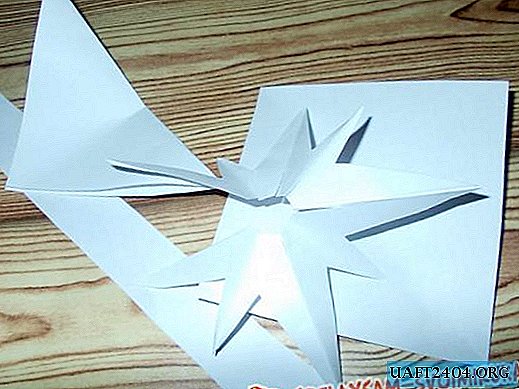
1. To make the middle of the flower, you need to bend the rectangular leaf as shown in the photo (7, 8). After making a hole in the corner, pass a copper wire into it - this will be the stalk. Roll up the blank, trying to form a bud. This part should not exceed 1 cm in diameter, otherwise it will be difficult to attach the petals to it.

2. A4 sheet of paper folded in half lengthwise, cut. Fold exactly one part with an accordion (into 8 fragments), draw a petal on it. For ease of attachment, the base of the petal should have a stalk about 1 cm wide and the same length. Petals neatly cut out. This will be the outer circle of the flower.

3. For the inner circle of the flower, cut the petals 1.5-2 cm shorter, six of them will be enough. We also leave the cuttings. In order to make it more convenient to bend around the base of the flower, in the middle of the handle we make a longitudinal incision.

4. After attaching the petal to the part, which is the middle of the flower, wrap it 3-4 times with thread, holding the end, then overlap and attach the second petal, etc. After the first inner circle is ready, immediately attach the lapels of the outer circle. If you see that the circle is closed, the last petal should not be used.

5. The flower is almost ready, but you need to cut the "shirt-front" - the flower bed. We fasten it also with a thread.

6. It remains to cut a thin strip 1.8 - 2 cm wide along the length of A4 and wrap it around the flower stalk to hide the wire and thread.
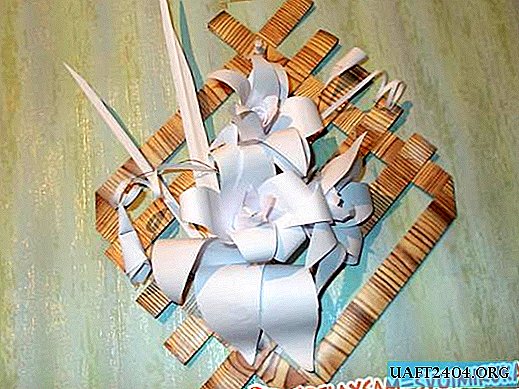
The flower is ready. You can make two more of the same size and two unopened buds. Leaves, arrows, feathers, curly tendrils - this is your fantasy. The petals of the outer circle must be wrapped with scissors - a lily is obtained.


It is important to fix the flowers well on the grate. It is convenient to do this with the help of a clerical stapler.


Share
Pin
Tweet
Send
Share
Send