With your own hands, literally within one hour you can make a miniature gas cutter using available materials that can be bought in a store or found at home. This homemade product is useful to everyone who likes to conduct various experiments.
The main stages of work
The device with the marking WFF-032-13130 acts as the main element of the gas cutter - this part can be bought at the radio electronics store. You will also need a housing for finger batteries, its contacts must be soldered to the contacts of the main part, on the "nose" of which you need to put on a flexible tube.
We insert finger batteries into the battery compartment with a built-in power button and close the case with the lid. Next, we connect everything together with hot melt adhesive. Also on the body of the battery compartment, you must use a tape to secure the lighter.

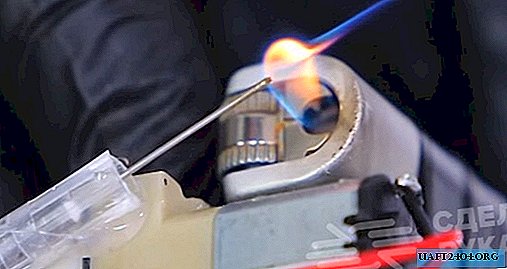
Also for this homemade product you will need a needle from a syringe and a cap to it. The edge of the cap must be trimmed and "planted" on hot melt adhesive in the upper part of the burner body. The needle must be inserted into the flexible tube and inserted into the cap so that its tip is directly above the nozzle of the lighter.
Operating principle
This makeshift device works very simply - you just need to turn on the motor, which pumps air through the pipe and ignite the lighter (while the flame should burn continuously). That's how you can make a gas mini-cutter at home.
The step-by-step process of making a homemade miniature burner can be seen in the video on our website.