Share
Pin
Tweet
Send
Share
Send
Recently, a flower has become a very popular accessory for all fashionistas. Most often, it is made manually in one of the techniques of needlework. Today I will tell you how to make a kanzashi rose at home with my own hands.
For the process we need:
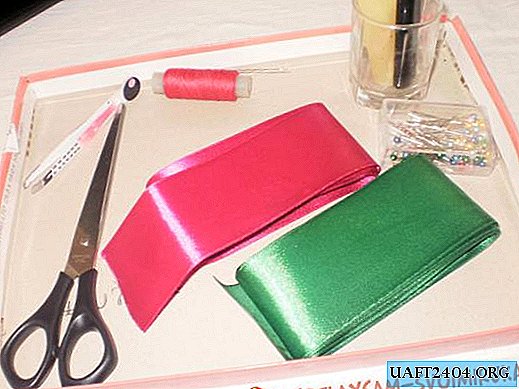
- Two types of satin ribbons, 5 cm wide.
- scissors
- candle or lighter
- tweezers
- sewing pins
- thread with a needle.
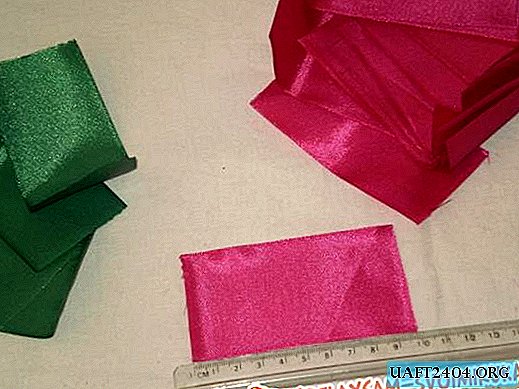
The first step is to cut the tape into equal segments. The width of each piece should be 5 cm and a length of 10 cm.
In order to work with tapes without loss, you need to melt their edges over the fire. Try to bring the edge to the lower level of the fire, so the material will not melt too much and will not become sooty. By the way, you need to bring the fabric to the fire with the wrong side down, so as not to leave streaks or traces of soot on the front side.

To make my rose, I needed 18 pieces of fuchsia ribbon for petals and 4 green for leaves.
We start making the petals. Place the tape vertically with the wrong side up. Now, bend the upper right corner to the middle of the lower part.

Do the same with the left side.

Next, the appeared right corner is attracted to the middle.

Repeat the procedure with the left corner and fix the resulting "house" with a pin.
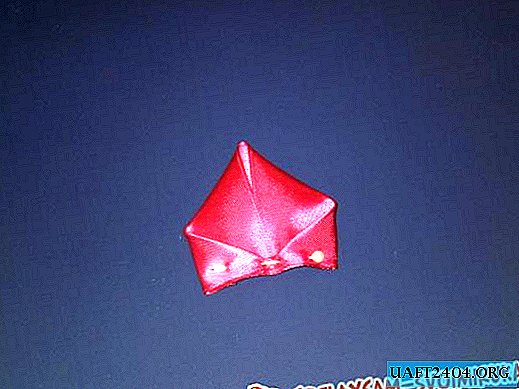
To create a flower you need 22 petals: 18 pink and 4 green.

Now, we collect everything in one tape. To do this, you need a thread in tone to the outer petals (I have green) and a long needle (preferably beaded). Stitch the right half of the petal,

and on the left we impose the right part of the second petal and sew them together.

In this way we collect all the prepared petals on a string.

Now start twisting the bud,

gradually stitching them with thread at the base.

When almost the whole flower is twisted,

you need to flash the entire base with a stitching seam to fix the result.

We begin to gradually give our bud the correct shape; for this, we turn the petals down one by one.

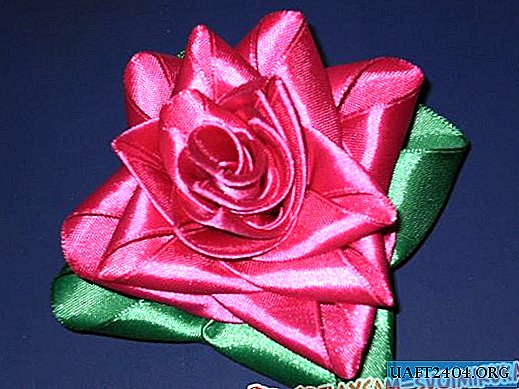
The result is such a flower.
If we want to use it as a brooch, we need to attach a fastener to it. The ideal solution would be to simply use the base from an old unnecessary icon,

but you can construct something similar yourself. To make it, you will need 2 pieces of cardboard or plastic, scissors, glue and a regular pin. In cardboard we make small cuts and carefully thread a pin into them so that the fixed part remains below.

Then glue the second layer of cardboard for thickness.

Next, we cut off all the excess so that the fastener is not visible due to the flower.

To attach it, pour well the base of the bud with glue. Special rubber glue is best, but you can get by with the usual “super” or “401”.

Now we press the lock blank to the glued base for a while and wait until the glue sticks.

Well, here is the flower and ready. You can use it as a brooch,

and you can fix it on the rim.


Share
Pin
Tweet
Send
Share
Send