Share
Pin
Tweet
Send
Share
Send
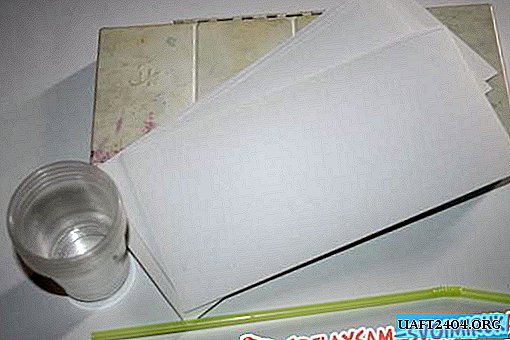
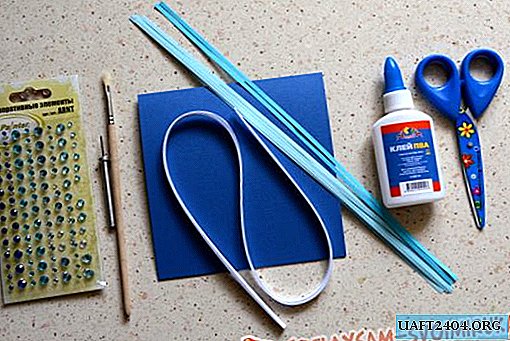
For this craft it will be necessary:
1. The dark blue base for postcards.
2. Paper for quilling of white, blue and blue colors; not more than 5 mm wide.
3. A quilling tool (or a simple toothpick).
4. PVA glue.
5. The brush.
6. Scissors.
7. Decorative elements.
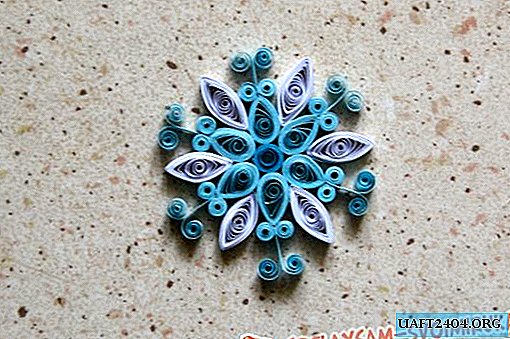
We start to make the snowflake directly. We will do it gradually row by row. First, make a blue center, that is, a simple medium-diameter spiral with a fixed end. According to the first element, there must be others. This means that you need to take into account and respect the proportions so that the whole figure looks harmonious. Next we twist 6 circles of blue stripes, clamp each one on one side, making an acute angle, and glue the convex part to the middle. It turns out a drop.

The second row is “horns” or a figure in which the paper is folded in half and the ends are twisted outward. It will also take 6 pieces. They must be attached to the “droplets”, as shown in the figure, after gluing the inner sides to each other, so that the form does not disintegrate and holds well.


Next, we will make 12 closed dense spirals in the form of small blue circles and place them on the sides of the figures made under the name “horns”. This will give the snowflake more volume and at the same time consolidate the previous details.

The next type of shape will be the “eye”. Here we use white paper. We twist 6 large and 6 smaller free closed spirals. This time we will squeeze the elements not from one, but from two opposite sides.

Large “eyes” with the pointed part should be glued between the “droplets” made earlier, while small ones will be located at the very top. We glue them to the “horns” at one corner, while the other is directed to the side.

Take a snowflake and attach it to the center of the base for the card. Only one part of it should be glued, this will open the card and add your wishes there if you plan to give it to someone on a memorable day. To fill in the empty spaces, you can use white stripes that will look good in contrast with a blue tint, and make curls out of them. They should vary in length. These curls are similar to patterns that appear in severe frosts on the windows. Place them in 4 corners.

We finish the card with decoration using shiny multi-colored beads. They can be placed so that you get small snowflakes next to the main one. We will decorate the middle with one bead, and a card on the theme of winter is ready.

The work is simple, but rather thin and painstaking. Follow slowly - and everything will turn out. And do not forget that the craft needs to dry well.
Share
Pin
Tweet
Send
Share
Send