Share
Pin
Tweet
Send
Share
Send
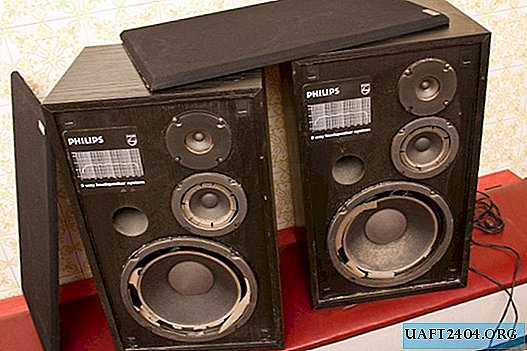
I like the old big and heavy speakers that were popular in the 90s. Despite their considerable age, they still sound pretty good and give out good bass. Recently, a couple of these speakers fell into my hands in a deplorable state, but I decided to restore them and bring them back to life.

Professional repair of such speakers is very expensive, therefore, quite working equipment is often simply thrown out and bought by modern subwoofers, which are compact in size.


Will need
For proper repair, rubber or any other elastic gaskets of a suitable diameter will be required. To accurately calculate the required size of the gaskets, you need to measure the outer diameter of the cardboard cone and the inner diameter of the steel frame, and on this basis, look for gaskets of the desired diameter.
- Rubber ring for speaker repair.
- Gaskets.
- Other accessories for the repair of dynamic heads.


Recovery work
I fixed the entire process of repairing the speakers on the camera. Below is a detailed photo report of all the steps.
First of all, after removing the front panel, you need to remove the old seal and glue from the circumference of the speaker. For this I used a flat sharp blade, but you need to do this carefully so as not to damage the cardboard cone.


To center the cone during gluing, you need access to the steel core. In large speakers, it is covered with a cardboard plug (it is glued), which must be carefully removed without damaging the cone. With cardboard plugs it turned out to pry them with a sharp knife, after which they came off at the glue connection, since they were not glued very tightly.


In small speakers, the dust caps were glued tightly, so they had to be carefully cut in a circle.


The next step is to accurately center the cone relative to the steel core. The free space between the cone and the core turned out to be different in each of the speakers. As an insulator and a kind of winding, I used strips of plain paper, which I pushed into the slot around the core until I reached the most dense filling.


In one of the small speakers, it took only a half turn of paper around the core, which led to a slight displacement of the cone. Fortunately, in my case, this fact did not affect the work of the speaker, but I think that it would be necessary to take thinner paper in order to complete two full turns.
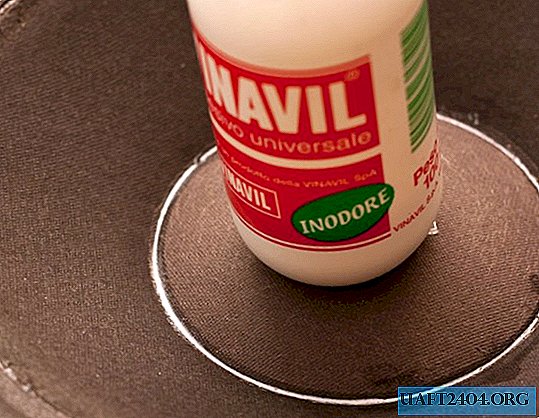
For gluing rubber or foam rubber seals, any household adhesive, for example, PVA or any similar one, which becomes transparent after drying, is suitable. Glue is applied to the cone and column body along the edge of the hole, after which the gasket is carefully applied. Smoothing it to the surface for a snug fit and removal of excess glue needs to be very carefully so as not to knock down the centering.


After the glue has completely dried, you can remove the paper cup wound around the core. To check the correct balancing of the cone, you need to slightly press on it with your hand: it should vibrate freely without touching the steel core. If friction is present, redo all centering work and stick on a new seal.

Now you need to install new damper gaskets around the speakers so that the front panel does not press and come into contact with them. By the way, you can use old gaskets, completely cleaned from glue, if they are in a normal (not deformed) state. The damper gasket sticks to any glue. If the inner diameter of the new gasket is slightly smaller and closes the rubber seal (this can interfere), then it needs to be cut a little around the inner circumference so that the cone vibrates freely.


To put dust caps in place, I did the following:
- I glued a narrow and folded strip of adhesive tape to each cap. It turned out a convenient loop so that you can move the semicircular part.
- The edges of the cap smeared with glue.
- Gently put the cap in its place and put a little load on the time required for the glue to set.


When I put the cap smeared with glue into place, the glue did not come out evenly: there were gaps in some places. To fill the voids, I walked with glue around the cap to get a neat, even and full seam.


When the glue is completely dry, the loops from the folded tape are carefully removed, after which the front panel is replaced.
Launch columns
So the exciting moment has come - connecting and launching the speakers. Having connected the speakers to my stereo system and turning them on, I was upset because the sound was terrible. But after a little thought, I came to the conclusion that this is due to new gaskets, which turned out to be more rigid than necessary. Therefore, I left the speakers turned on, and after about an hour, when all the new elements that I introduced into the design of the speakers "got used to", the sound began to improve, and I was able to enjoy my favorite music.

Original article in English
Share
Pin
Tweet
Send
Share
Send