Share
Pin
Tweet
Send
Share
Send
This article will tell you how to make a cute sleeping toy. For this you need:
- fabric soft to the touch (bike, felt, flannel, knitwear or something like that) of any color 40x50 cm in size;
- velvet or leatherette black 5x2.5 cm;
- threads (colors of the main fabric and colors of the opposite), needle;
- filler for toys.
First, on a newspaper sheet, draw the outline of a future toy. Then we cut it out and, attaching it to the fabric and securing it with pins, we outline it with a special marker for the fabric or with an ordinary soap. Cut two halves of the "body" of a toy dog. For the ears on the fabric we draw four contours, cut out.
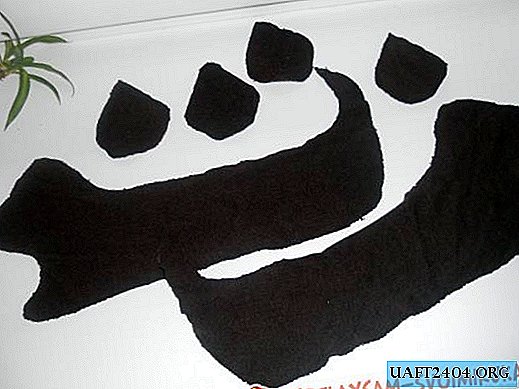
We sew the patterns of the body between themselves from the wrong side. It’s not worth sewing up to the end, in one place we leave a small non-sewn hole for subsequent filling with the previously selected filler.

We turn out the stitched base for the toy body on the front side. Then we stuff the toy (tightly, but not tight) and carefully sew up the hole.

Getting to stitching the ears. To do this, take two patterns of ears and sew them from the wrong side along the edge. We leave a small area unstitched in order to turn the ears to the front side. We twist, sew the unstitched section, sew it to the head.

Then sew the nose out of black fabric (or leatherette). We embroider the closed "sleeping" eyes, cilia and claws on the paws with coarse thread.

That's it, the Dachshund toy for sleep is ready. For decoration, you can sew patches of bright fabric onto the toy, attach a bow or make a cover on the back.

During stuffing with a filler, you can also put a linen bag with mint or motherwort in the dog’s head for the best sleep of the child.

Share
Pin
Tweet
Send
Share
Send