If you work in a carpentry (woodworking) workshop or you often have to process large wooden blanks at home, then this home-made device will definitely be useful for you, as it will significantly increase the capture area. To make such a tool will require a minimum of time and materials. Well, let's get started?
Homemade manufacturing process
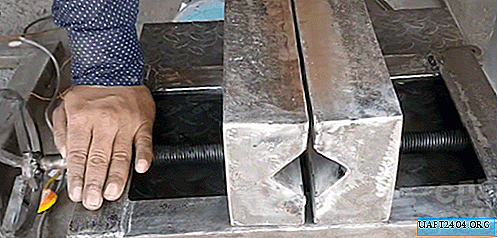
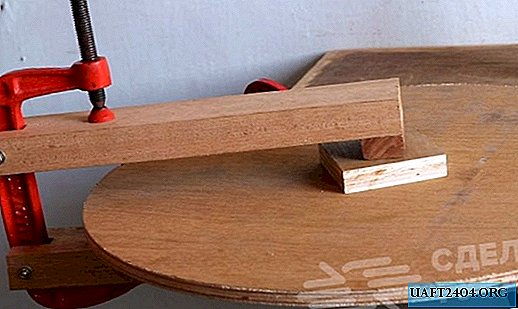
First you need two wooden bars 100x50 mm 14 cm long. After that, at the ends of the bars you need to make a cut under the clamp using an electric jigsaw or on a band saw. The marking is carried out based on the size of the clamp itself - the lines are drawn using a square so that everything is smooth and neat. In order to choose a groove, you can drill a hole with a drill or use the "grandfather method" - a joiner's chisel.
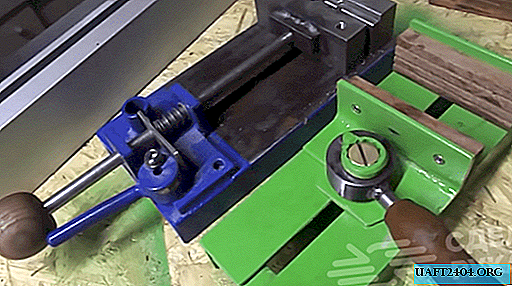
Then you need to insert the clamp into the resulting slots and make a marking for through holes. Please note that you need to drill holes not only in the bars, but also in the body of the clamp, so there should be two drills at hand: one for wood, the other for metal. On the opposite inner side of the bars, you need to "plant" two wooden stops on the glue of the carpentry. They should be in the same plane with the end part.

This design is assembled quite simply - with the help of long bolts with nuts. Such a connection is a quick disconnect, so you can use a clamp in its original form or with an extension cord if necessary. This device is very simple in terms of design, but indispensable when working with large-sized wooden blanks.
# 1 Clamp add-in
submitted by  Anton 08.05.2018, 11:31
- Report
Add entry
Picture Video Audio Text Insert code